This document provides assorted links and advice to help you use a word processor or editor to write your homeworks. My goal is not to provide complete documentation but rather to give you pointers on how to get started and what kind of functionality you should look for in tools to compose CSE homeworks. I assume that you are already familiar with basic word processing or text editing, so I'll focus on two areas of particular importance: writing math and drawing figures.
For a summary of formatting requirements specific to this class, as well as submission procedures, please see the accompanying E-homework guide. For a justification of why we use electronic homework submission, please see my rant.
I will discuss features of four different tools: Microsoft Word (part of MS Office), Google Docs, OpenOffice/LibreOffice, and LaTeX.
If you are a current Wash U. student, you can obtain Microsoft Word for free (for Windows or Mac) as part of the university's Office 365 program. Note that the above link gets you the full, locally installed Office apps; the web-based Office Online apps lack the capability to compose math formulas. If you already have Office 2007+ for Windows or 2011+ for Mac, you don't need to upgrade to use the features described below.
Google Docs runs in your web browser; there's nothing to install, though you will need a Google account.
OpenOffice is free to download from the Apache Software Foundation. The closely related LibreOffice is also free. You can get either for Windows, Mac, or Linux.
LaTeX is free for Windows, Mac, and Linux (among other operating systems!). For information on where to get it for your machine, see these recommendations. Windows users in particular should note that the recommended Windows package includes the TeXstudio interactive LaTeX editor. You can also begin to use LaTeX immediately, without installing anything, by using Overleaf, a web-based LaTeX editor that interactively previews your formatted document as you type.
Unlike the other tools listed above, LaTeX is not an interactive word-processor. You use a plain text editor to prepare your source document, then build the PDF from this source using the pdflatex program. Within the source document, you specify mathematical formulas using markup, but you won't see the typeset results until you build the PDF (though some tools, like Overleaf, continually rebuild a preview for you in the background as you type).
While I've listed LaTeX last, it is actually the preferred tool of computer scientists and mathematicians everywhere for writing research papers and documentation. I've used LaTeX for over 20 years; it's what I use to write all your assignments and my class notes and handouts. Please give serious consideration to learning LaTeX -- it is incredibly flexible and powerful, whether you're writing a homework, a paper, or an entire book. Take a look at this example code to get started, and see below for pointers to much documentation.
A huge variety of tools is available to add mathematical formulas and symbols to your documents. All require investing some time to learn, so you should consider which tools will let you do what you need efficiently, now and in the future.
Some key questions to ask about any math composition tool are:
If you compose documents containing math, you will soon realize the benefits of being able to enter formulas and symbols directly from the keyboard, without breaking the flow of composition. Moreover, if you expect your documents to be printed at high resolution, viewed at multiple sizes, or translated into different file formats (PDF, HTML, etc.), it is essential that your equations be represented symbolically rather than as images. I would not invest time learning a tool that does not offer both keyboard composition of formulas and symbolic representation of the results.
It used to be that if you wanted keyboard math entry in your editor, you either used LaTeX or bought a commercial add-on for Word, such as MathType. These may still be the best choices if you are publishing research papers in math or theoretical CS. However, for purposes of homework, you can get by just fine with other tools' built-in math support.
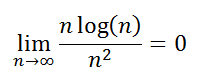
To enter math from the keyboard, you use a markup language that lets you name special symbols and operators with multi-character strings. Each tool has its own markup language, though they all share some similarities. For example, suppose I want to enter the formula
In MS Word, I would type
lim_(n\to\infty) n log(n)/n^2 = 0The same formula in Open Office would be
lim csub {n rightarrow infty} {{n log(n)} over {n^2}} = 0
In Google Docs, it would be entered (including spaces and newlines) as
\lim n\rightarrow\infty
\frac n \log(n)
n^2

= 0
while the equivalent LaTeX markup is
\lim_{n\rightarrow\infty} \frac{n \log(n)}{n^2} = 0
You'll have to learn the markup language used by your software of choice.
Word versions 2007 or newer for Windows and 2011 or newer for Mac have good support for composing mathematical formulas. Older versions of Word used a more primitive Equation Editor tool that does not support efficient keyboard entry of formulas. Unfortunately, math support has not been ported to Word Online (as of August 2015).
Microsoft provides decent online documentation on how to compose mathematical formulas from the keyboard in Word. To use more advanced features beyond the scope of your homeworks, you'll want to look at this technical report.
For Mac users of Office 2011, you may want to read this summary of how the Mac and Windows versions of math support differ.
You may also find this cheat sheet of markup for mathematical symbols useful.
I find that the automatic conversion of markup to math as you type (which Word calls "math autocorrect") can sometimes behave unpredictably -- especially with fractions, where Word has difficulty telling where the denominator ends. You may have the best experience with a mix of markup and toolbar-based usage. Note that you can go back and edit a formula interactively using the menu ribbon once you've typed it in, so it's OK if your first cut at entering a formula isn't perfect.
Finally, if you want to have convenient access to math symbols such as Greek letters and operators while writing plain text (not just in displayed equations), the following recipe works in Word 2010 for Windows, and there should be very similar tricks in other versions. Go to File/Options/Proofing, select "AutoCorrect Options", choose the "Math AutoCorrect" tab, and check "Use Math AutoCorrect outside of math regions". You will now be able to enter markup for special characters, such as \alpha or \leq, while typing ordinary text and have them converted to symbols on the fly.
You should start by reading the documentation for Google Docs' math mode. Note that from the keyboard (in Windows), you can type the two-key sequence "Alt-shift-i e" to begin entering an equation without using the menu ribbon; something similar undoubtedly works on the Mac.
Google Docs' repertoire of math symbols is somewhat limited, as it lacks support for linear algebra and arrays of equations. I have also found the behavior of keyboard formula entry to be a bit quirky, for reasons similar to MS Word.
There is an external add-on called "Formula Editor" available for Google Docs that lets you enter LaTeX markup and formats the result using a 3rd-party service. When I tried this add-on with the simple formula above, the the result was editable in Google Docs; however, more complex formulas are unfortunately rendered as bitmapped images.
NB: if you go looking for additional online help with Google Docs' math mode, you should know that around 2011, Google switched to the current interface from an older one based on LaTeX. Advice from before 2012 is likely to be outdated.
The best documentation I've found about OpenOffice's Math Mode is their Wiki pages. LibreOffice has somewhat more limited online help, but it has a much better math mode guide document.
OpenOffice acts a bit differently than Word or Google Docs, in that you have to enter math markup in a window separate from the main document. You can use the three-key sequence "Alt-i o f" to start entering a formula and Esc to finish without leaving the keyboard. I've found OpenOffice more predictable in interpreting markup than Word or Google Docs because you can easily enclose things like the subscript of a limit or the numerator and denominator of fractions in curly braces, which removes any ambiguity about your intent.
Math markup in LaTeX is typed in plain text, just like the rest of your document. You can include math markup in the middle of a line of text by enclosing it in "$" characters before and after. If you want a displayed equation set on its own line, you instead enclose the markup with the pair "\[" and "\]". Fancier enclosing directives are available if you want numbered formulas or a horizontally aligned stack of formulas.
To get started writing LaTeX documents, take a look at this online tutorial and/or this introduction. Lesson 4 of the tutorial or Sections 3.2-3.3 of the introduction provide all the information you need to write simple formulas, though Sections 3.5 and following of the latter offer more advanced constructs that you may find useful. You can also consult this more detailed reference manual (chapter 17 is about math mode) or this Wiki-based book on LaTeX. Or, if you are the type who just wants an example to get started, here's an example.
We provide a LaTeX template for your homework as part of the E-Homework guide.
If you want to practice your LaTeX math markup, try this web service, which interactively typesets LaTeX math into a (bitmapped) image as you type. You can also enter LaTeX math markup directly in Piazza comments by enclosing it in the pair of characters "$$" both before and after.
You can draw and save figures either as bitmapped images or as vector graphics, which are encoded as a series of curves and lines. Vector graphics are preferable, since they look good in print and on any size screen.
Ideally, your editor should have robust support for composing figures using vector graphics natively and/or importing them into your document in a standard vector format such as PDF or EPS. Pretty much all editors support importing bitmapped images, but you should treat this as a fallback; vector graphics are preferable.
Word supports insertion of shapes and lines directly into a document. For figures containing more than one shape, you should first create a new drawing canvas (see the option at the bottom of Insert/Shapes), then draw your figure inside the canvas. You can also create a figure on a blank page in Powerpoint and cut and paste that figure into your document.
An annoying property of Word figures is that resizing them rarely works as expected. Changing the size of a canvas does not scale the contents by default, though this can be changed on a per-canvas basis. You can grab all the objects in the canvas and resize them together. Unfortunately, resizing does not change the font size of any text in your figure, which often leads to bizarre results!
To resize a figure in a canvas or from Powerpoint uniformly, copy it to the clipboard and then paste it as an image into your document. The result will still be stored as vector graphics, but it will resize as a unit. However, you will not be able to edit the resulting figure. For this reason, it is wise to create and store editable versions of your figures in a separate document (Word or Powerpoint) and then paste them as images into your assignment as needed.
You can import PDF and EPS figures from other programs into Word, but Word won't display them on-screen unless the figure has a "preview image" in it. The preview, if it exists, is a bitmapped image and therefore looks pixelated, but when you save the resulting document (natively or as a PDF), the original, vector version will be used.
Use the "Drawing" tool in Google Docs to create figures, which are then embedded in your document. Unlike in Word, resizing a figure resizes its text as expected. You can also download your figure as a PDF that can be added to documents in other programs.
There does not appear to be a way to insert an external PDF or EPS figure directly into your document as vector graphics. If you can save your figure as WMF (a vector graphics format invented by Microsoft), you can open it in Google Drawings and thence paste it into your document. LibreOffice Draw and Inkscape are two free tools that can do PDF to WMF conversion. Otherwise, you'll have to convert the figure to a bitmapped image before uploading it.
You can use the OpenOffice or LibreOffice Draw tool to create figures, which can be saved as PDF or in the tool's native .odg format. To get a figure produced with Draw into your document, you can copy it to the clipboard and paste it into Writer. You can also create figures directly in Writer using its "Drawing" toolbar. To keep your figure together, you may wish to insert a frame first and draw inside that.
To resize a figure drawn within Writer or Draw, you'll have to resize the component objects. Unfortunately, resizing a figure does not resize the text (similar to MS Word). To work around this limitation, you can select your entire figure in Draw and perform "Modify/Convert to Curve", which turns all the text into shapes that resize along with the rest of the figure. However, once you do this, you can no longer edit the figure's text -- so make a backup of your figure first!
While you cannot import or paste a PDF figure directly into a document in Write, you can convert such figures to .odg format by opening them in Draw, then proceed as above. LibreOffice Draw does the conversion natively; for OpenOffice, you'll first have to install the PDF Import extension. Note that the conversion may not preserve all the characteristics of your original figure (especially fonts), so check carefully after importing.
LaTeX, not being a WYSIWYG word processor, does not support interactive figure drawing. However, it has excellent support for importing figures from other programs.
\includegraphics[width=xx]{foo}
where "xx" is the desired width of your figure in the document. I
recommend replacing xx by "y \textwidth", where where "y" is a
floating-point number between 0 and 1. This makes your figure a y
fraction of the width of a text line on the page and keeps its height
proportional to its width.
LaTeX does have a facility for specifying vector graphics directly using markup. I don't recommend using it for most purposes. However, if you want to draw figures of finite automata, check out the VauCanSon-G add-on package.
As we've seen, Powerpoint, Google Drawing, and OpenOffice Draw are three tools that can produce PDF figures for use in your documents. Many other figure drawing tools exist. In particular, you may want to look at InkScape, a very feature-rich drawing tool similar to Adobe Illustrator. For drawing trees and graphs, I've heard good things about the yEd program.
If you produce PDFs for your figures, you will often find that you need to crop them to remove surrounding white space when inserting them into your document. If your drawing tool of choice doesn't support cropping or saving with a tight bounding box, you will need some other way to do this. Most editors let you crop a figure after insertion (LaTeX does so via the "bb" option to \includegraphics), but this doesn't help much if you can't see the figure in order to crop it!
Mac users can use the built-in Preview tool to crop PDFs. For Windows, a popular free tool is Briss. If you prefer to work from the command line (particularly for Linux users, who may already have all the needed tools installed), check out pdfcrop. Finally, most commercial PDF editors, such as Adobe Acrobat, Foxit, or Nitro Pro, support cropping and otherwise editing PDFs.