Prep
If you haven’t already done so, complete Prep: Intro
Overview
In today’s studio we will:
- Import a repository into Particle Desktop.
- Complete your Studio work
- Practice using Markdown for formatted documents.
- Research some basic IoT concepts.
- Compare/contrast your work with other students and update your findings
1. Studio/Assignment Distribution
READ ALL OF THE FOLLOWING CAREFULLY BEFORE STARTING
Most Studios and Assignments will be distributed via GitHub classrooms. Here are the steps you’ll typically need to perform to get the Studio/Assignment:
- A repository will be needed for each group. Each group needs to make one GitHub group (link in the next step) and everyone in the group should be a member of the GitHub group!!!.
- Today you will be working individually (so a group of just yourself), but keep the details about groups in mind for studio sessions (where you’ll be in groups of 3-4).
- Repository names should include all group member surnames. Other information, like the class and studio, is optional. (Ex:
Studio00_StevensXuif the group consisted of Stevens and Xu). Today you will have an individual repository and won’t have the ability to name it yourself. - One person should create the group and all other group members should join it. All members have equal access, so it doesn’t matter who creates and who joins. You must be a member of a submitted repo to resolve any disputes about missing credit, so be sure that all members of groups join the group and that the repo is committed!
- If the “creator” is logged in to GitHub on their computer, others could use the same computer and an “anonymous” browsing tab to login to GitHub and then join the group.
- Each person needs to follow a link. Today (Studio 0) you should follow this one: https://classroom.github.com/a/-b2TP1-6
- The first time you follow a link for this class you may need to do either/both:
- Authorize GitHub classroom to access your GitHub account by clicking an Authorize button.
- Associate your GitHub account with your WUSTL key by selecting your WUSTL key from a list.
- Again, one person in the group needs to create the group. (See naming convention above) Everyone else needs to join it.
- The first time you follow a link for this class you may need to do either/both:
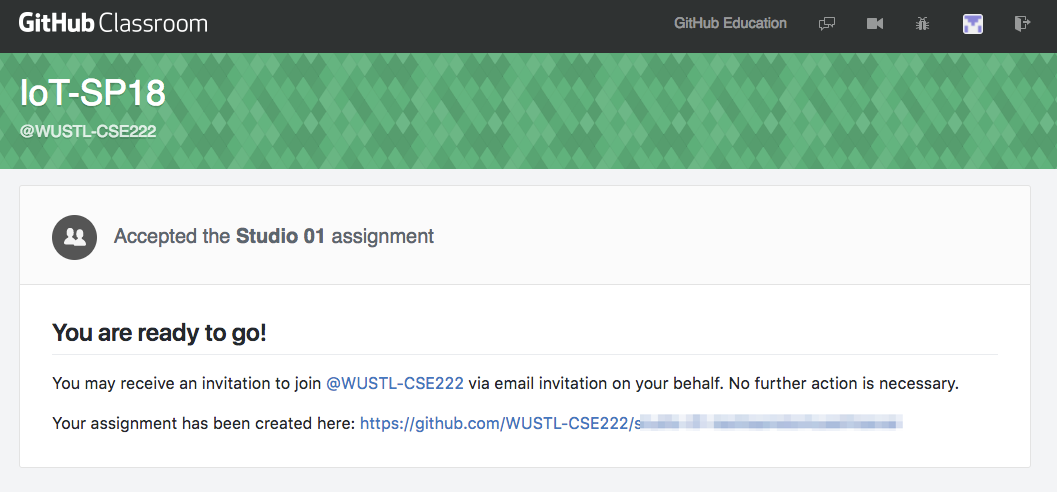
- When done, a repository will be created. The page should look something like:
- From this point on, everyone could work from a single computer (although everyone can also follow these steps at anytime to import the repo to individual machines). Open GitHub Desktop on that computer (and login if you haven’t already).
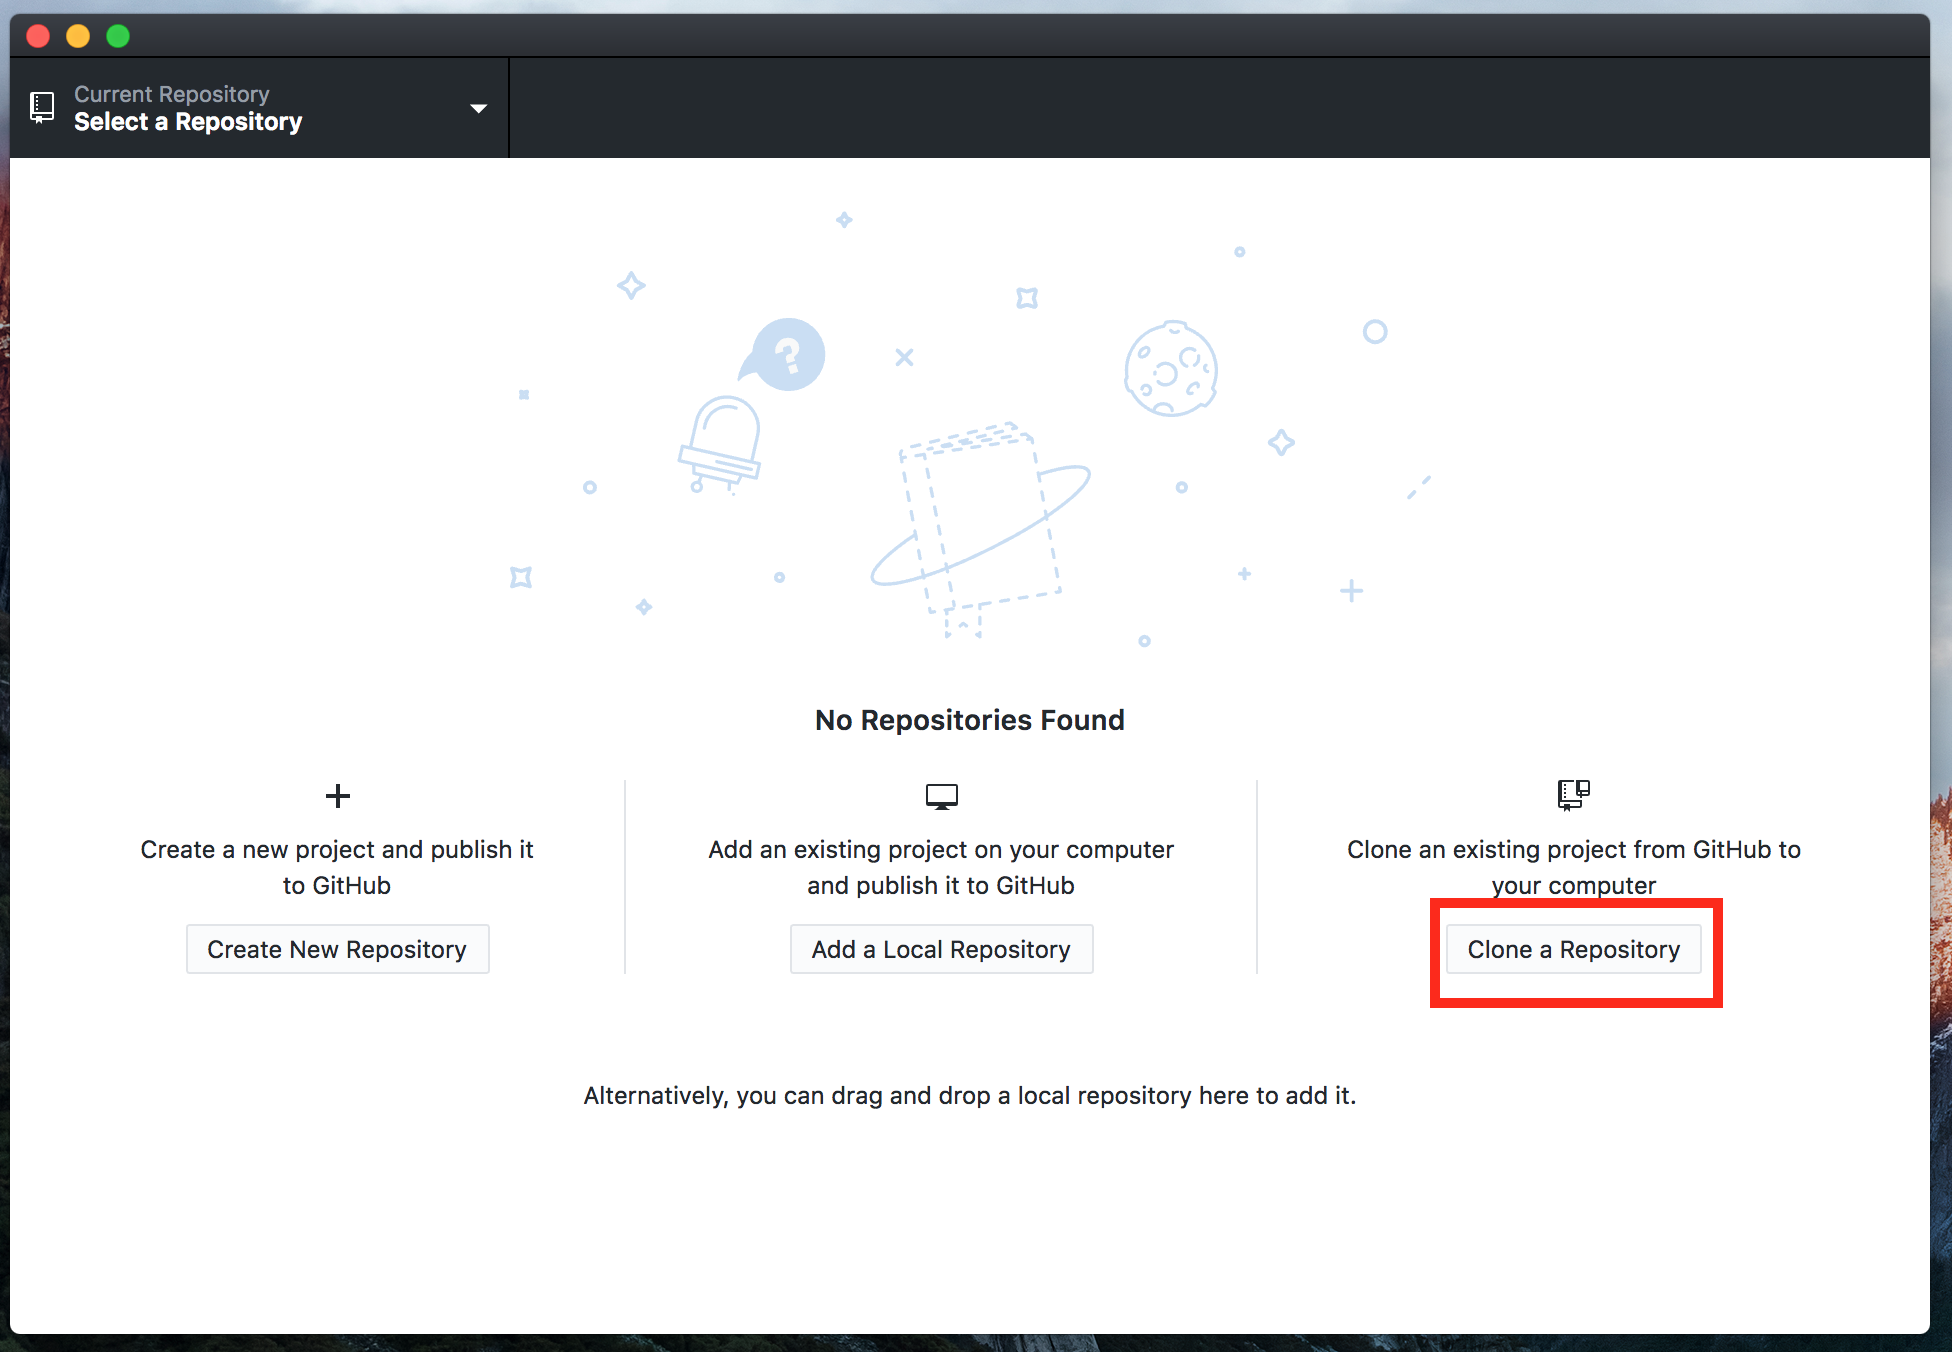
- Select the
Clonebutton (orFile > Clone a Repository...if you have already imported other repositories).
- The Note that the Clone pane should have the GitHub tab selected. The pane has four areas of interest:
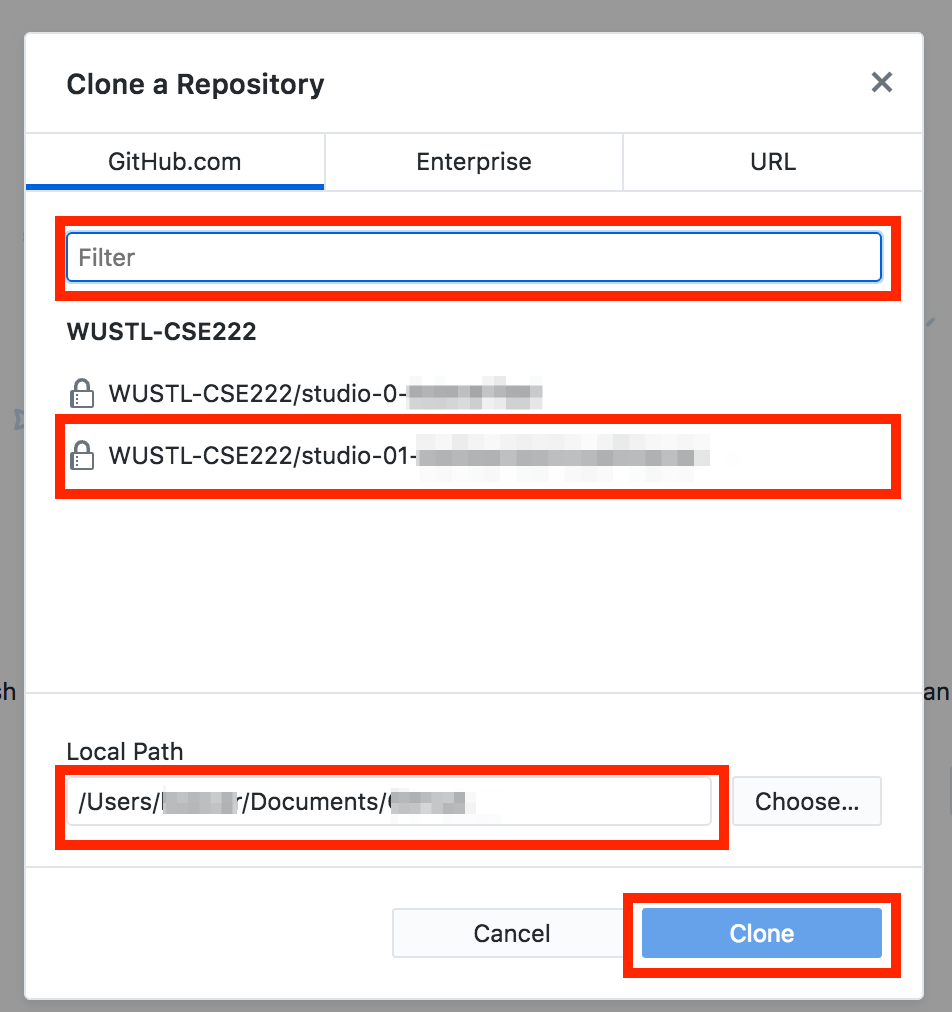
- The filter may be used if you have many repositories and want to search for just one.
- There is a list of matching repositories. Select the one you want to clone (Studio 00 today).
- The “Local Path” (Destination folder). You may want to create a folder just for 222 work and put all your 222 repos in that folder. Remember this folder because you’ll need to import the project in Particle Desktop IDE.
- The “Clone” button, which you use once you’ve selected the repository and destination.
- Clone the repository to the computer you’ll be working on (i.e., select the repo, select the path, and hit clone).
- Open Particle Desktop IDE and select
File > Add Project Folder...and select the folder for the newly cloned Repository. - In Particle Desktop, open the Project’s folder and open the
README.md, which you’ll be using in the remainder of the studio. You may also want to open the Markdown preview on theREADME(Packages > Markdown Preview > Toggle Preview).
2. Today’s Studio
- We’ll be using Markdown, which is a simple markup language. Markdown is commonly used for documentation in a variety of computer science applications, including on GitHub. Markdown allows you to focus on the content and structure of a document, but then displays it in a pleasing format. Review GitHub’s Mastering Markdown guide, which is estimated to take about 3 minutes to read/review.
- Open the
README.mdfile, which contains the questions for today’s studios. You will add your answers/work to this file where indicated. - After completing your work in the
README.md, discuss your work with two peers.
3. Studio Submission
Once you complete the studio:
- Be sure to save any changes to any files (only
README.mdtoday) - Return to the GitHub Desktop application and be sure that the Studio repository is selected.
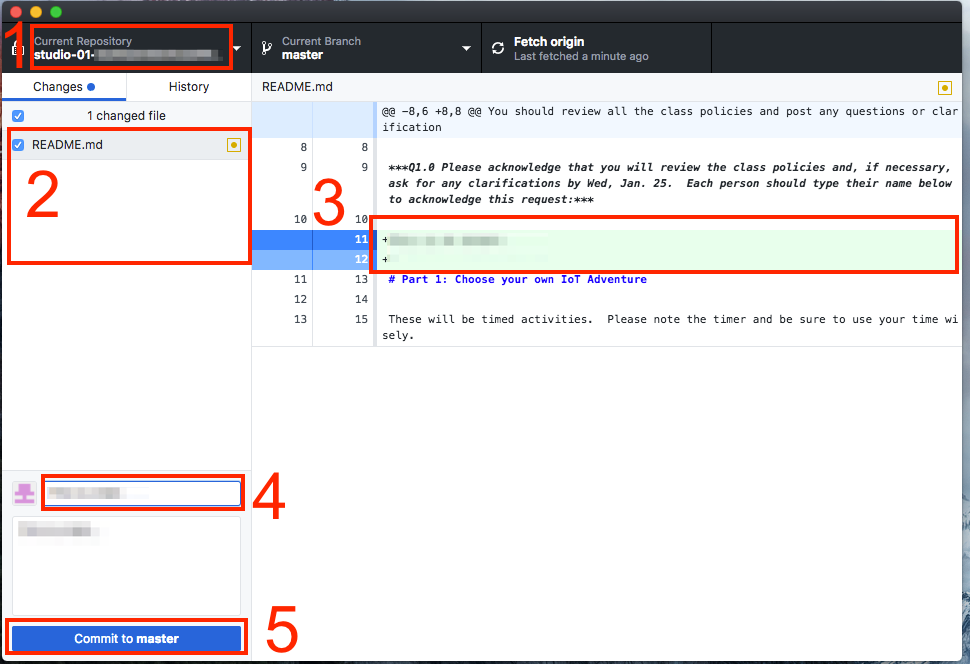
Note the areas of this window:
- You can select the repository you want to work with.
- You can see the files that have changed or been added since the last commit. You will want to be sure anything you’ve changed is selected!
- There’s a pane that will let you compare changes in files so you can see how they’ve been changed.
- There’s a box to enter the commit message. You need to enter a brief description here before you can commit.
- The
Commitbutton.
- Enter a Commit message and commit your changes. This only changes your local repository, not the one on GitHub. You must change the repository on GitHub to submit your work!!!.
- Be sure you select
Repository > Pushto commit your changes to GitHub.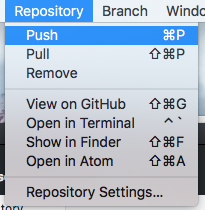
- Go to GitHub, select the repository, and verify that your changes have been pushed to GitHub.
5. Studio Checkout
- Open your GitHub.com page to the repository and verify that changes are posted.
- Let a TA know you are ready to check out.
- Show the TA/instructor your committed work and discuss it with them.
- Complete the checkout process with the TA.