Prep: Intro
Overview
Assignments for this class will use a variety of development tools and a variety of accounts with web-based services. Three in particular will be used for virtually every assignment and activity:
- a GitHub account, which will be used to get code for assignments, submit work for assignments, and, often, for feedback on work;
- the GitHub Desktop application, which will be used to retrieve and submit assignments from GitHub; and
- the Particle Desktop IDE, which is somewhat comparable to Eclipse.
Today’s “studio prep” is about ensuring that you have the proper accounts and have started to setup the tools needed.
GitHub
According to GitHub,
- “GitHub is how people build software” and
- “We’re supporting a community where more than 27 million people learn, share, and work together to build software.”
The team-based, distributed approach to software development that is supported by tools like GitHub is a fundamental part of contemporary software development.
GitHub Account
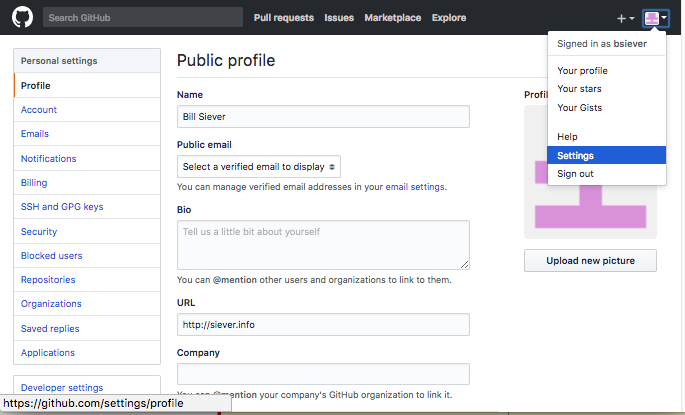
- Go to GitHub and either create an account or log in to your current account.
- Once you are logged in, go to your account settings:
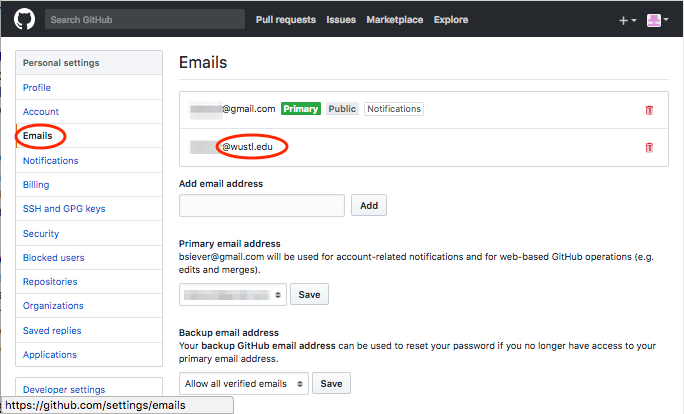
- Select the e-mail tab and verify that your account is associated with your WUSTL e-mail account. If not, add your WUSTL e-mail address and accept the confirmation request.
GitHub Desktop
Download and install GitHub Desktop, which we will use to retrieve and submit assignments.
Alternatives
The examples shown in here will use the GitHub Desktop app because it’s a user friendly way to work with GitHub repositories. You are welcome to use other tools, but we can’t provide much assistance with them. The two major alternatives that make sense here are:
- The command-line version of
gitis available for all major platforms. - The Particle Desktop IDE (Dev) we’ll be using (below) has some GitHub support.
Particle Desktop
Later in the semester we’ll be using a small Arduino-like processor called the Photon. The Photon was developed by Particle. Particle has also created a corresponding development environment called “Particle Desktop (DEV)” (in addition they have a cloud based development environment, called Particle Build). In reality, Particle Desktop is just an extension of Atom, an IDE developed by GitHub. Particle has enhanced Atom in a few significant ways:
- They have included a Serial Monitor window, much like the one in the Arduino IDE, which helps developers use log-based debug messages on processors like the Photon;
- They have included a way to program the Photon itself via Particle’s cloud services; and
- They have provided a “Console”, that allows developers to interact with Particle’s devices and cloud services.
Install Particle Desktop
- Go to the Particle Desktop IDE site, click on “Get the Desktop IDE”, and download the appropriate version for your computer. Note: Particle is replacing their Desktop IDE with a new product called Particle Workbench. This semester we will continue to use the older Desktop IDE. Use the download links here and do NOT follow the link to Particle Workbench.
- Install the IDE.
- The Mac version is zip file that just needs to be unzipped. Feel free to move it to your Applications folder or leave it on your desktop.
- The Windows version is an executable file that will install the desktop IDE for you. (Note: At the time of this writing there have been some reports of the most recent windows installer failing. Older versions are available here. If the installer fails, try the 1.18 version.)
Configure
Today we’ll add two packages (additional features) to Particle Desktop that may be useful later in the semester.
- Launch Particle Desktop. On the first Launch it will allow you to add packages:
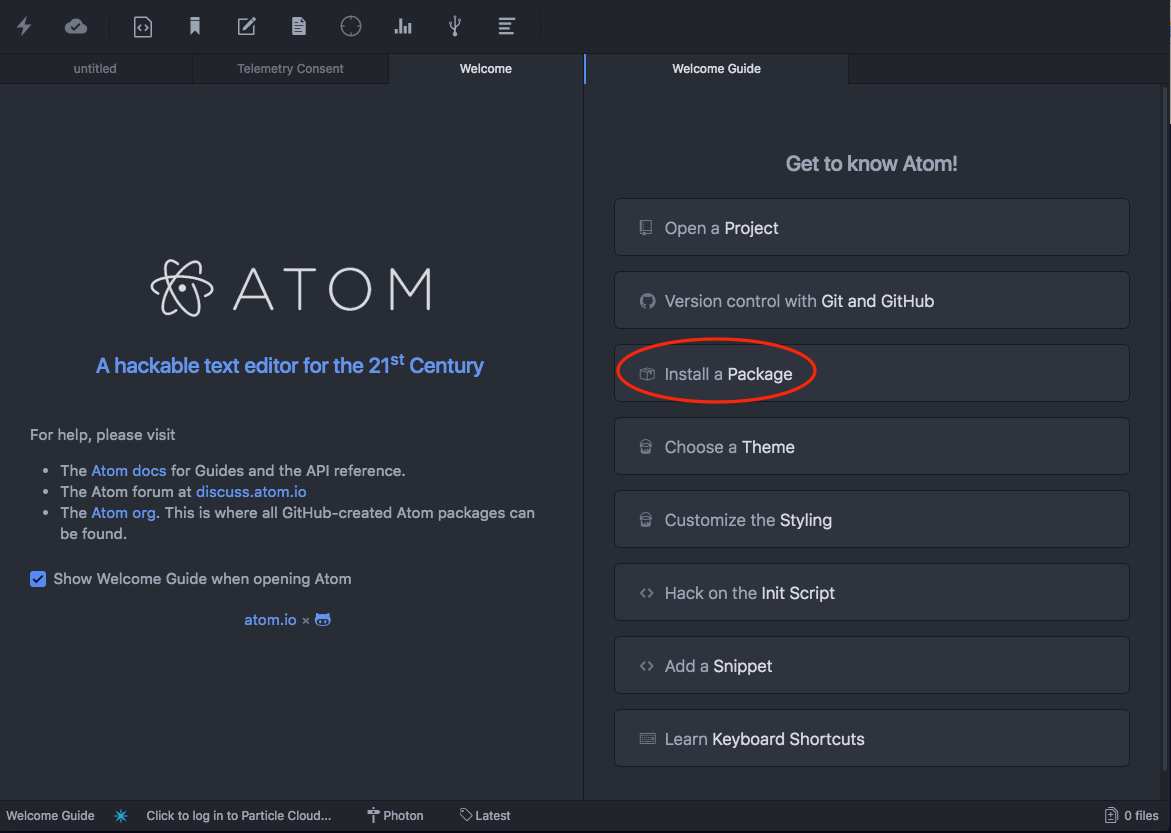
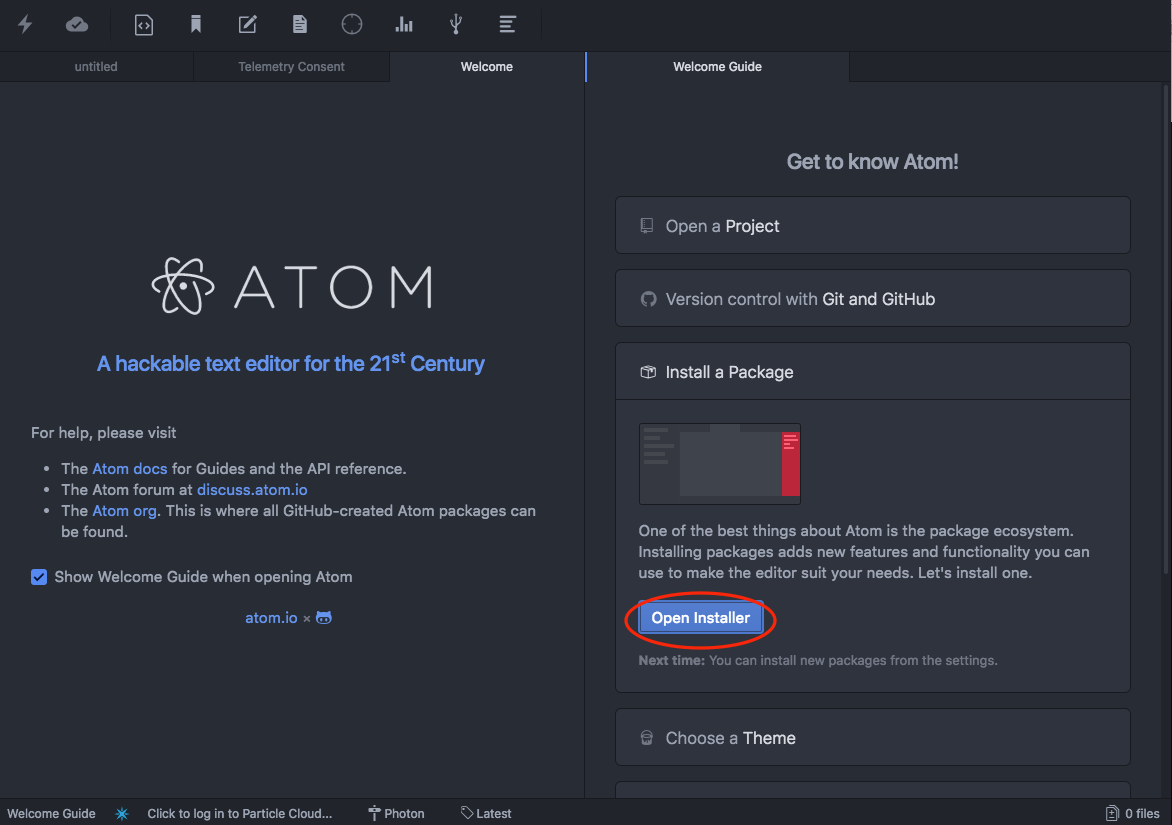
If the tab isn’t opened, you can get to it via- macOS:
ParticleDev → Preferences...and then theInstalltab. - Other:
File → Settingsand then theInstalltab.
- macOS:
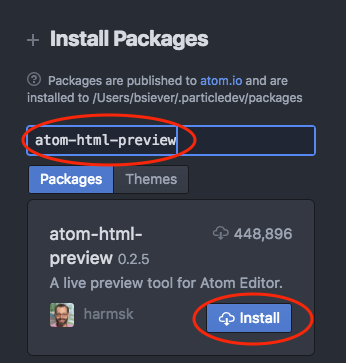
- Install the
atom-html-previewpackage.- Enter the package name in the search box and press enter to start the search.
- Once the package is shown, select the
Install
