When you select a behavior, the behavior definition area changes to show all of the associated parameters and data items for the currently selected behavior. The parameters are shown at the top of the behavior description area and the data items at the bottom.
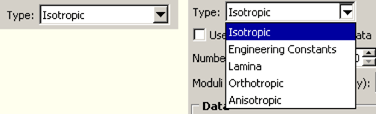
Depending on your analysis requirements, you choose to either accept or change the default parameter values; for example, you choose whether to use isotropic elasticity by using the Type button on the elasticity form, as shown in Figure 12–10.
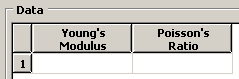
A table containing fields for the remaining required material data appears beneath the parameter area; for example, Figure 12–11 shows the table that appears when you choose isotropic elasticity.
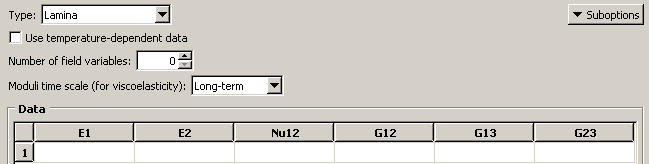
Different fields become available depending upon how you have set the parameters. For example, when you choose lamina elasticity rather than isotropic elasticity, the table in Figure 12–12 appears. You can enter data into the table using the keyboard. Alternatively, you can click mouse button 3 anywhere in the table to view a list of options for specifying tabular data. For example, an option exists for automatically entering data from a file. Another option exists for creating an X–Y data object from the data in the table; you can plot the X–Y data in the Visualization module and visually check its validity. For detailed information on each option, see “Entering tabular data,” Section 3.2.7.For detailed information on specific features in the material editor, see the following sections: