Difference between revisions of "Project1: Implement algorithm using microphone array"
From ESE497 Wiki
Jump to navigationJump to search| Line 1: | Line 1: | ||
==PC Implementation - Work in groups of 2== | ==PC Implementation - Work in groups of 2== | ||
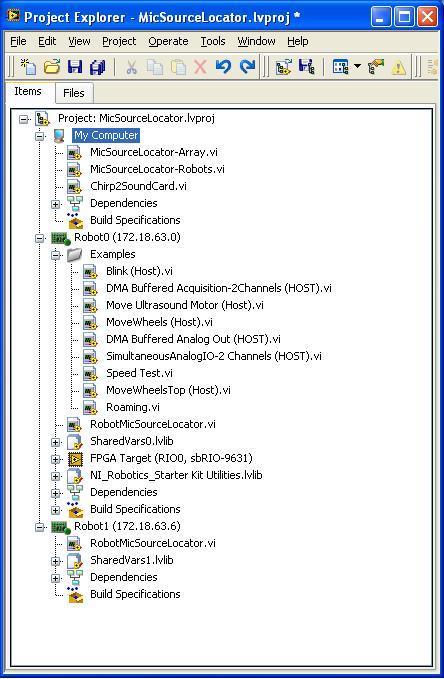
*'''Download''' [[media:RoboticSensing.zip|RoboticSensing.zip]] and extract to your Home Directory. Run RoboticSensing\MicSourceLocator.lvproj. | *'''Download''' [[media:RoboticSensing.zip|RoboticSensing.zip]] and extract to your Home Directory. Run RoboticSensing\MicSourceLocator.lvproj. | ||
| − | [[File:MicSourceLocatorProject. | + | [[File:MicSourceLocatorProject.jpg|MicSourceLocator Project]] |
*'''Double-Click on My Computer->MicSourceLocator.vi.''' This is the starting point for your application. In the end, your VI should look like [[media:MicSourceLocatorSolution.jpg|this]]. Pay attention to the drawing on the Simulator.vi front panel to see the definition of the microphone indices. | *'''Double-Click on My Computer->MicSourceLocator.vi.''' This is the starting point for your application. In the end, your VI should look like [[media:MicSourceLocatorSolution.jpg|this]]. Pay attention to the drawing on the Simulator.vi front panel to see the definition of the microphone indices. | ||
*'''Simulation''' | *'''Simulation''' | ||
Revision as of 16:36, 28 June 2010
PC Implementation - Work in groups of 2
- Download RoboticSensing.zip and extract to your Home Directory. Run RoboticSensing\MicSourceLocator.lvproj.
- Double-Click on My Computer->MicSourceLocator.vi. This is the starting point for your application. In the end, your VI should look like this. Pay attention to the drawing on the Simulator.vi front panel to see the definition of the microphone indices.
- Simulation
- Create FindCCPeak subVI to compute the relative delay between the microphone pairs. Instantiate this into your while loop.
- Create ComputeAngle subVI to compute the angle of arrival from the delay and the microphone pair geometry.
- Create ComputeIntersection subVI that computes the triangulation equation to estimate the source location. Use Functions -> Mathematics -> Script & Formula -> MathScript Node so that you can use Matlab syntax. Trap the case where theta is 90 degrees and set the tangent to 1,000,000 instead of infinity.
- Create Web subVi that computes all of the possible triangulations. Use your ComputeAngle and ComputeIntersection subVIs.
- Plot the results of the Web and the Source Location estimate on an XY graph. To add additional traces to the XY graph, you need to use Functions -> Express -> Signal Manip -> Merge Signals instead of Build Array.
- Test with the 4 microphone array microphone array. Connect the line out from the PC to a speaker and generate a chirp on the sound card using Chirp2SoundCard.vi from the zip file.
- In the DAQ Assistant, make sure the Analog Inputs (Voltage) are from the USB-6212, differential, +/- 1 V, Continuous Samples, Samples to Read = 50k, Rate(Hz) = 50K. Make sure you wire the Stop control into the DAQ Assistant
- Test with "Real Simulated Data", use RealSimData.vi from the zip file to troubleshoot.
- When everything is working, clean up your block diagram and modularize your code so it looks like the solution. This will make porting your code to the robot easier.
