Difference between revisions of "Project2: Triangulation with sbRIO robots"
From ESE497 Wiki
Jump to navigationJump to search| Line 3: | Line 3: | ||
*'''Description''' of [[Description of RoboticSensing.lvproj| RoboticSensing.lvproj]] | *'''Description''' of [[Description of RoboticSensing.lvproj| RoboticSensing.lvproj]] | ||
* Make sure you run your code from a mapped network drive | * Make sure you run your code from a mapped network drive | ||
| − | * If you get error -52003, then you | + | * If you get error -52003, there is probably an un-handled exception. If you are using Cross-Correlation then the problem is you are running out of memory. |
* Run Sample Code: | * Run Sample Code: | ||
** Get 2 sbRIO robots and place them near the blackboard for good wireless reception. Make sure the Motor Power switch is off. Turn on the Master power switch. Wait 10 seconds and right click on Robot0 and select Properties and enter the IP labeled on the robot. Repeat for Robot1. | ** Get 2 sbRIO robots and place them near the blackboard for good wireless reception. Make sure the Motor Power switch is off. Turn on the Master power switch. Wait 10 seconds and right click on Robot0 and select Properties and enter the IP labeled on the robot. Repeat for Robot1. | ||
Revision as of 22:21, 20 March 2012
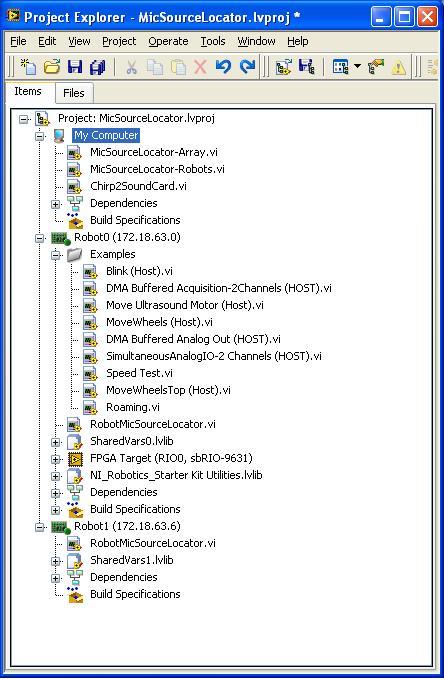
- Download RoboticSensing.zip and extract to your Home Directory if you haven't already. Run RoboticSensing\MicSourceLocator.lvproj.
- Description of RoboticSensing.lvproj
- Make sure you run your code from a mapped network drive
- If you get error -52003, there is probably an un-handled exception. If you are using Cross-Correlation then the problem is you are running out of memory.
- Run Sample Code:
- Get 2 sbRIO robots and place them near the blackboard for good wireless reception. Make sure the Motor Power switch is off. Turn on the Master power switch. Wait 10 seconds and right click on Robot0 and select Properties and enter the IP labeled on the robot. Repeat for Robot1.
- Open My Computer -> MicSourceLocator-Robots.vi. Run this VI.
- Open Robot0 -> RobotMicSourceLocator.vi. Run this VI.
- Open Robot1 -> RobotMicSourceLocator.vi - change the Robot0? Control to false since this is Robot1. Then run this VI.
- Once all 3 VIs are running, you should see the MicSourcLocator-Robots -> MotorMoving indicator turn off and the b value of MicSourceLocator-Robots -> PairSolutions count up. The signals for both microphones will be displayed on the graphs on both instances of RobotMicSourceLocator.vi
- Turn on the Motor Power switch. Click on MicSourceLocator-Robots.vi -> MoveRobots and the motors should turn 1 revolution.
- Compute Angle on a Single Robot
- Modify RobotMicSourceLocator to Compute the angle of arrival on the Robot platform using your FindCCPeak.vi and ComputeAngle.vi. It should transmit the angle to MicSourceLocaotr-Robots running on the PC using the Shared Variables.
- Source Location using 2 Robots
- Modify MicSourceLocator-Robots.vi to compute the source location and plot the web using the angles computed on the robots
