Serial Communication between Raspberry Pi & Arduino
From Arduino to Raspberry Pi
Arduino code
A sample arduino code is created below. The code is very simple—printing “Hello World!” every two seconds.
void setup(){
  Serial.begin(9600);
}

void loop(){
  Serial.println("Hello World!");
  delay(2000);
}
Figuring out the port
Then, we need to figure out the port that connects Raspberry Pi & Arduino. Type in the following command in your terminal without Arduino plugged into Raspberry Pi. The command means to list out all the ports with the beginning of "tty".
pi@raspberrypi $ ls /dev/ttty*
Then connects the two devices with your USB cable, and type in the command above again. There shall be a new port appears; if that is the case, the new name is the port name of your Arduino. The picture on the right is a demo of what should be like.
Python Code
Now, we open a new sketch of python program on your Raspberry Pi.
import serial
ser = serial.Serial('/dev/ttyUSB0', 9600)
while 1:
    if(ser.in_waiting >0):
        line = ser.readline()
        print(line)
The first line is to import the module named serial. Then we are creating an object with port name of "/dev/ttyUSB0" (the port name you just found out)and baud rate of 9600. In the while loop, our program will print each line it reads from the stream. Also, there are many other functions for the serial module; you can check the documentation.
Now you can first upload your Arduino program you just wrote, and then run the python program. If everything works well, you will see the python console printing " Hello World!" every two seconds, just like the picture on the right shows.
From Raspberry Pi to Arduino
Python Code
Now we need to ask Raspberry Pi to write data to Arduino
We will use ser.write function this time. It simply writes one byte of data to Arduino each time. What is a bit tricky is that the function accepts data types in bytes only. If you want to write a string or integer, you must encode it first.
If you want to send a integer, float, or double constant, you can encode it as the folowing shows:
int_encode = b'2'
float_encode = b'42.3'
If you want to send a string, you can encode it as the folowing shows:
string1 = "Hello!"
string1_encode = string1.encode()
If you want to send a integer, float, or double variable, you can encode it as the folowing shows:
int1 = 5
int1_encode = b'%d' %int1  # you need to change %d based on the type your variable
Here I write a python program to write integer 3, 5, 7 to Arduino.
import serial
ser = serial.Serial('/dev/ttyUSB0', 9600)
ser.write(b'3')
ser.write(b'5')
ser.write(b'7')
Arduino Code
This time I write an Arduino program that outputs the product of all the number that has been read by Arduino. Remember that Serial.read() reads in character represented by ASCII.
int r = 1;
void setup(){
  Serial.begin(9600);
}
void loop(){
  if(Serial.available()){         //From RPi to Arduino
    r = r * (Serial.read() - '0');  //conveting the value of chars to integer
    Serial.println(r);
  }
}
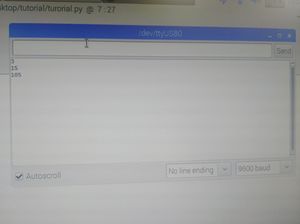
Now you are able to test out your codes! Upload your Arduino sketch first and then run the Ptyhon program. If everything goes correctly, you should expect output like the picture on the right shows.


