Difference between revisions of "BetaDelta"
| Line 120: | Line 120: | ||
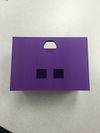
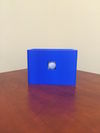
First, we created a model of our design in CAD. Next, we printed a scaled-down version to see if the printer could handle its shape and intricacies. Then we printed our first to-scale version, and soon after printed our final version. | First, we created a model of our design in CAD. Next, we printed a scaled-down version to see if the printer could handle its shape and intricacies. Then we printed our first to-scale version, and soon after printed our final version. | ||
====Evolution==== | ====Evolution==== | ||
| − | [[File:P1.JPG| | + | [[File:P1.JPG|100px|CAD drawing]] --> [[File:P2.JPG|100px|Down-Sized Print]] --> [[File:P3.JPG|100px|First To-Scale Print]] --> [[File:P4.JPG|100px|Final To-Scale Print]] |
===Circuitry and Code=== | ===Circuitry and Code=== | ||
Revision as of 02:01, 2 May 2017
Contents
Overview
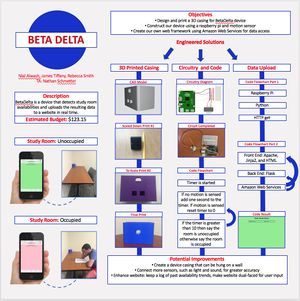
The purpose of BetaDelta is to provide real-time updates on the availability of a given study room. The information will be uploaded to a website, developed through Amazon Web Services, based on input from the BetaDelta device. The goal for the BetaDelta device is to detect occupancy via motion sensor, connected to a raspberry pi, and encased in a 3D printed shell.
Team Members
- James Tiffany
- Rebecca Smith
- Nial Alwash
- Nathan Schmetter (TA)
Objectives
Device
- Constructed with a raspberry pi and motion sensor
- Encased in a 3D printed shell
- Code the raspberry pi to receive input from the sensor and upload it onto our server
Website
- Developed with Amazon Web Services
- Have the to display updated room occupancy via wifi
- Change colors based on occupancy (red for occupied, green for available)
Challenges
- Learn Python coding techniques
- Learn how to use CAD and 3D print
- Recreate circuit tutorials for motions sensor to raspberry pi connection
- Create our own framework for the server and website using Amazon Web Services
Budget
Gantt Chart
Engineered Solutions
3D Printing
First, we created a model of our design in CAD. Next, we printed a scaled-down version to see if the printer could handle its shape and intricacies. Then we printed our first to-scale version, and soon after printed our final version.
Evolution
Circuitry and Code
We found a tutorial online for how to connect the motion sensor to the raspberry pi, completed the circuit, and then edited a version of code we found online using a counter technique to accept input from the sensor.
Evolution
Data Upload
We developed entirely our own framework, using bits and pieces from tens of tutorials. Our code was two-pronged, including a first set that interpreted the input from the motion sensor and raspberry pi, and a second set that handled the upload of data, display, and communication between our server and database.
Evolution
Results
Presentation Poster
Repository


