Difference between revisions of "Setup"
| (28 intermediate revisions by the same user not shown) | |||
| Line 1: | Line 1: | ||
{{:Coursera Setup}} | {{:Coursera Setup}} | ||
| + | =Bitbucket= | ||
| + | ==accept invite== | ||
| + | The first minute of [[https://wustl.app.box.com/s/34nidhbvvnm60lujl9qzug3x45e8ckb8 this video]] (from CSE 131) shows off how to accept a bitbucket invitation sent to your email. | ||
| + | |||
| + | ==access== | ||
| + | choose one of the following paths | ||
| + | ===set up app password=== | ||
| + | [https://support.atlassian.com/bitbucket-cloud/docs/app-passwords/ set up an app password for bitbucket] | ||
| + | ===set up ssh key=== | ||
| + | If you already have an ssh key, add your public key to bitbucket. | ||
| + | |||
| + | Otherwise, create a new key and add the public key to bitbucket. | ||
| + | |||
| + | [https://support.atlassian.com/bitbucket-cloud/docs/set-up-an-ssh-key/ set up an ssh key for bitbucket] | ||
| + | |||
| + | |||
| + | =Java= | ||
| + | ==Language== | ||
| + | * Download [https://www.oracle.com/java/technologies/downloads/ JDK] (17 or greater) | ||
| + | * Install JDK (17 or greater) | ||
| + | |||
| + | ==IDE== | ||
| + | ===IntelliJ=== | ||
| + | * [https://www.jetbrains.com/idea/download/ Download and Install IntelliJ IDEA Community or Ultimate] | ||
| + | |||
| + | ===clone repo=== | ||
| + | <!-- | ||
| + | <youtube>4KaKieHuD_E</youtube> | ||
| + | |||
| + | Note: in this video I imported into an empty workspace. If you already have projects in your workspace, you can find Import... from the File Menu in Eclipse. | ||
| + | --> | ||
=ML= | =ML= | ||
==Language: Standard ML of New Jersey== | ==Language: Standard ML of New Jersey== | ||
| Line 10: | Line 41: | ||
[https://islovely.co/posts/painless-installation-of-sml-on-os-x/ via homebrew] | [https://islovely.co/posts/painless-installation-of-sml-on-os-x/ via homebrew] | ||
--> | --> | ||
| + | |||
| + | ====v15 Sequoia==== | ||
| + | [https://piazza.com/class/m070pkvkjx77ng/post/46 Fall 2024 Fix] | ||
===Windows=== | ===Windows=== | ||
| − | [http://www.smlnj.org/dist/working/index.html download msi installation] | + | ''Summer 2023 Note:'' There seems to be an issue with v110.99.3. |
| + | |||
| + | [[http://smlnj.cs.uchicago.edu/dist/working/110.99.2/index.html Download and install v110.99.2]]. | ||
| + | |||
| + | If you run into trouble, getting as close to Linux as you can is a good idea. | ||
| + | |||
| + | If replacing Windows with Linux is out of the question, [https://gist.github.com/tedz2usa/725307535cb4c336941d13e2e5cf86eb installing the Windows Subsystem for Linux] can often be close enough: | ||
| + | <!-- [http://www.smlnj.org/dist/working/index.html download msi installation] --> | ||
| − | |||
| − | |||
| − | |||
| − | |||
| − | |||
| − | |||
===Linux=== | ===Linux=== | ||
[https://www.smlnj.org/install/index.html via apt-get or yum] | [https://www.smlnj.org/install/index.html via apt-get or yum] | ||
==Editor== | ==Editor== | ||
| + | '''Alert:''' Emacs is '''NOT''' required or encouraged for this course. | ||
===VS Code (Preferred)=== | ===VS Code (Preferred)=== | ||
* [https://code.visualstudio.com/download Download and Install VS Code] | * [https://code.visualstudio.com/download Download and Install VS Code] | ||
| Line 35: | Line 71: | ||
[[File:OpenFolder.png|600px]] | [[File:OpenFolder.png|600px]] | ||
| − | + | <!-- | |
===or Sublime Text (Alternate)=== | ===or Sublime Text (Alternate)=== | ||
* [https://www.sublimetext.com/3 Download and Install Sublime Text] | * [https://www.sublimetext.com/3 Download and Install Sublime Text] | ||
| + | --> | ||
=Racket= | =Racket= | ||
| Line 44: | Line 81: | ||
=Ruby= | =Ruby= | ||
| − | + | {{:Ruby_Setup}} | |
| − | |||
| − | |||
| − | |||
| − | |||
| − | |||
| − | |||
| − | |||
| − | |||
| − | |||
| − | |||
| − | |||
| − | |||
| − | |||
| − | |||
| − | |||
| − | |||
| − | |||
| − | |||
| − | |||
| − | |||
| − | |||
| − | |||
| − | |||
| − | |||
| − | |||
| − | |||
| − | |||
| − | |||
| − | |||
| − | |||
| − | |||
| − | |||
| − | |||
| − | |||
| − | |||
| − | |||
| − | |||
| − | |||
| − | |||
| − | |||
| − | |||
| − | |||
| − | |||
| − | |||
| − | |||
| − | |||
| − | |||
| − | |||
| − | |||
| − | |||
| − | |||
| − | |||
| − | |||
| − | |||
| − | |||
| − | |||
| − | |||
| − | |||
| − | |||
| − | |||
| − | |||
| − | |||
| − | |||
| − | |||
| − | |||
| − | |||
| − | |||
| − | |||
| − | |||
| − | |||
| − | |||
| − | |||
| − | |||
| − | |||
| − | |||
| − | |||
| − | |||
| − | |||
| − | |||
| − | |||
Latest revision as of 01:58, 21 September 2024
Contents
Coursera
- follow the link to Programming Languages Part A
- click "Join For Free" in the top right corner.
- do what you need to do to join coursera (and log in, if necessary).
- click on enroll for free
repeat for
Bitbucket
accept invite
The first minute of [this video] (from CSE 131) shows off how to accept a bitbucket invitation sent to your email.
access
choose one of the following paths
set up app password
set up an app password for bitbucket
set up ssh key
If you already have an ssh key, add your public key to bitbucket.
Otherwise, create a new key and add the public key to bitbucket.
set up an ssh key for bitbucket
Java
Language
- Download JDK (17 or greater)
- Install JDK (17 or greater)
IDE
IntelliJ
clone repo
ML
Language: Standard ML of New Jersey
Mac OSX
NOTE: recently, macOS 10.15 Catalina switched the default shell from bash to zsh. As a result, you may need to edit .zshenv instead of .bash_profile. You can alternatively switch your default shell in VS Code to bash.
v15 Sequoia
Windows
Summer 2023 Note: There seems to be an issue with v110.99.3.
[Download and install v110.99.2].
If you run into trouble, getting as close to Linux as you can is a good idea.
If replacing Windows with Linux is out of the question, installing the Windows Subsystem for Linux can often be close enough:
Linux
Editor
Alert: Emacs is NOT required or encouraged for this course.
VS Code (Preferred)
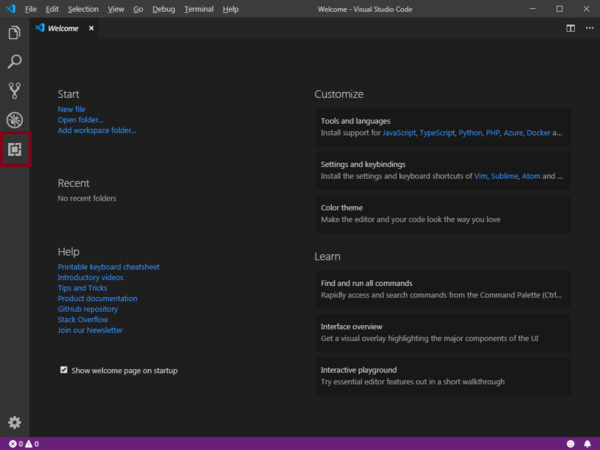
- Download and Install VS Code
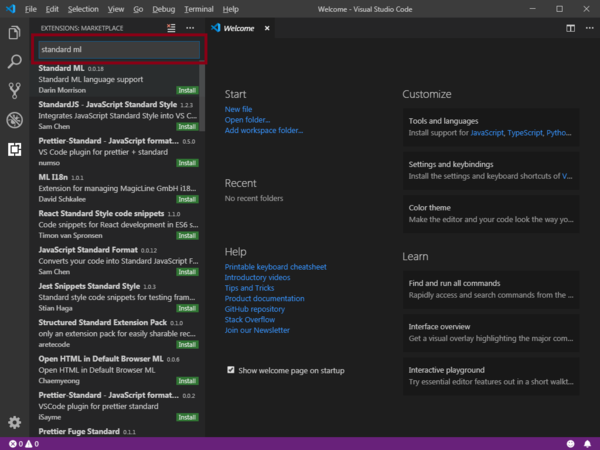
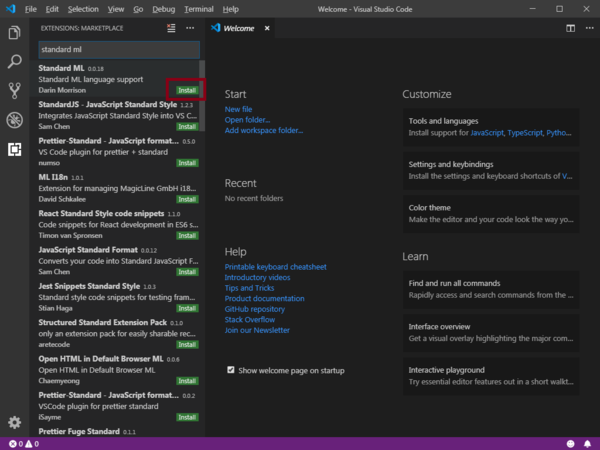
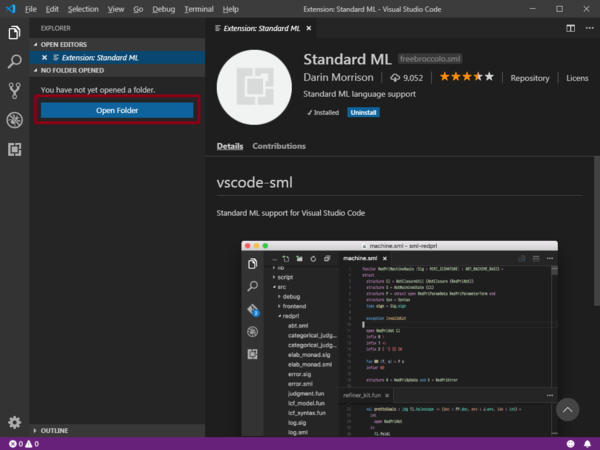
- Add Standard ML language support by Darin Morrison
Racket
Language and IDE
Ruby
Language
Mac OSX
Note: depending on how the permissions are set up on your machine you may need to prefix a command with sudo or perhaps you may have to omit sudo.
Homebrew
/bin/bash -c "$(curl -fsSL https://raw.githubusercontent.com/Homebrew/install/master/install.sh)"
Install Ruby
brew install ruby
Add Ruby To Path
if Mac OSX 10.15 Catalina or greater
~/.zshrc
else
~/.bash_profile
Add this line:
export PATH="/usr/local/opt/ruby/bin:$PATH"
check ruby
You can either
1) restart your terminal
or
2) source the appropriate configuration file based on your shell (which is often dependent on the OSX version)
source .zshrc
or
source .bash_profile
Then run
ruby --version
which should report version 2.7.2 as of Fall 2020.
OS Gem
sudo gem install os
PNG Gem
sudo gem install chunky_png
OpenGL Gem
sudo gem install opengl-bindings
Opener Gem
sudo gem install opener
Zip Gem
sudo gem install zip
Windows
Ruby
Download and Install Ruby+Devkit 3.1.2-1 (x64)
OS Gem
gem install os
PNG Gem
gem install chunky_png
OpenGL Gem
gem install opengl-bindings
Zip Gem
gem install zip
OpenGL Runtime
NOTE: the first time you run one of the course's Ruby script which uses OpenGL, it will automatically download and extract FreeGLUT and GLFW3 to your ~/Downloads/CSE425s folder and use the files within.
Opener Gem
gem install opener
Linux
Ruby Language
Fedora
Ubuntu
sudo apt-get install ruby-full
OS Gem
sudo gem install os
PNG Gem
sudo gem install chunky_png
OpenGL Runtime
sudo apt-get update
sudo apt-get install libglu1-mesa-dev freeglut3-dev mesa-common-dev
sudo apt-get install libglfw3-dev
OpenGL Gem
sudo gem install opengl-bindings
Opener Gem
sudo gem install opener
IDE
- Apply for student status with JetBrains
- Download and Install RubyMine
- Ensure that the Ruby SDK and Gems setting is correctly configured
Check Installation
OpenGL
Mac users- run this:
| file to run: | src/main/ruby/installation_check/mac_osx_glfw_downloader_and_extractor.rb |
Everyone, including Mac users, run this:
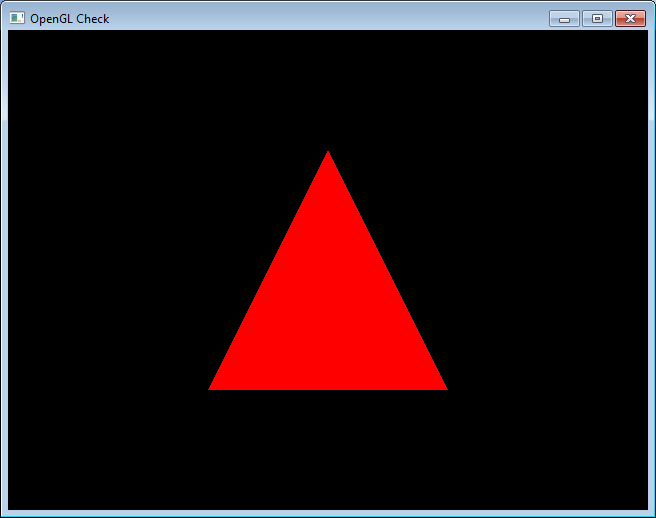
| file to run: | src/main/ruby/installation_check/opengl_check.rb |
OpenGL Texture
| file to run: | src/main/ruby/installation_check/opengl_texture_check.rb |
