Difference between revisions of "Render Part A Assignment"
| (61 intermediate revisions by the same user not shown) | |||
| Line 1: | Line 1: | ||
| − | = | + | =Diagram= |
| − | + | [[File:Diagram_part_a.png|600px]] | |
| − | |||
| − | |||
| − | : [https://www. | + | =Code to Use= |
| − | : [https://www. | + | ==[https://www.cse.wustl.edu/~dennis.cosgrove/courses/cse425s/current/doc/Graphics.html Graphics]== |
| + | : [https://www.cse.wustl.edu/~dennis.cosgrove/courses/cse425s/current/doc/Graphics.html#draw_convex_polygon-instance_method draw_convex_polygon] | ||
| + | : [https://www.cse.wustl.edu/~dennis.cosgrove/courses/cse425s/current/doc/Graphics.html#draw_curve-instance_method draw_curve] | ||
| + | : [https://www.cse.wustl.edu/~dennis.cosgrove/courses/cse425s/current/doc/Graphics.html#draw_image-instance_method draw_image] | ||
| + | : [https://www.cse.wustl.edu/~dennis.cosgrove/courses/cse425s/current/doc/Graphics.html#draw_string-instance_method draw_string] | ||
| − | + | ==Point2== | |
| − | |||
| − | |||
| − | |||
| − | : [https:// | + | ==[https://ruby-doc.org/core-2.6/Math.html Math]== |
| + | : [https://ruby-doc.org/core-2.6/Math.html#method-c-cos Math.cos(radians)] | ||
| + | : [https://ruby-doc.org/core-2.6/Math.html#method-c-sin Math.sin(radians)] | ||
| − | + | <!-- | |
| − | + | =Code to Investigate= | |
| − | + | ==Cavalcade of Graphics== | |
| + | {{RubyToRun|cavalcade_of_graphics|cavalcade_of_graphics|main}} | ||
| − | + | [[File:Cavalcade of graphics.png]] | |
| + | --> | ||
| − | = | + | =Code to Implement= |
| − | + | Each of the renderable components has its own file in the <code>src/main/ruby/drawings/core</code> directory. | |
| − | + | Be sure to add accessors for all constructor parameters. | |
| − | |||
| − | |||
| − | + | [https://www.rubyguides.com/2018/11/attr_accessor/ How to use attr_accessor] | |
| − | |||
| − | |||
| − | + | ==Equilateral Triangle== | |
| − | + | {{RubyToImplement|equilateral_triangle|drawings/core|EquilateralTriangle|Object|initialize(half_side_length)<br/>half_side_length()<br>half_side_length=()<br/>render(g)}} | |
| − | [[File: | + | [[File:Equilateral Triangle Render Studio.svg]] |
[https://en.wikipedia.org/wiki/Equilateral_triangle wikipedia] | [https://en.wikipedia.org/wiki/Equilateral_triangle wikipedia] | ||
| − | The triangle should be equilateral, with the origin at the center of mass. | + | '''WARNING:''' Ruby division of two integers results in an integer. For example: 1/3 == 0 |
| + | |||
| + | The triangle should be equilateral, rendered with its the origin at the center of mass. | ||
| + | |||
| + | Your constructor should accept a <code>half_side_length</code> parameter. | ||
| + | |||
| + | Add an [https://www.rubyguides.com/2018/11/attr_accessor/ accessor] for half_side_length. | ||
| − | The height | + | The height of the triangle should be side_length * sqrt(3)/2 |
The center of mass is one third from the bottom. | The center of mass is one third from the bottom. | ||
| − | + | So, the bottom left point A's x coordinate should be <code>-half_side_length</code> and its y coordinate should be <code>-1/3 height</code>. | |
| + | |||
| + | {{RubyToRun|equilateral_triangle|drawings/core|main}} | ||
| + | |||
| + | [[File:Render_equilateral_triangle.png]] | ||
| + | |||
| + | ==Rectangle== | ||
| + | {{RubyToImplement|rectangle|drawings/core|Rectangle|Object|initialize(half_width, half_height)<br/>half_width()<br>half_width=()<br/>half_height()<br>half_height=()<br/>render(g)}} | ||
| + | |||
| + | Add an [https://www.rubyguides.com/2018/11/attr_accessor/ accessors] for half_width and half_height. | ||
| + | |||
| + | {{RubyToRun|rectangle|drawings/core|main}} | ||
| + | |||
[[File:Render_rectangle.png]] | [[File:Render_rectangle.png]] | ||
| − | + | ==Ellipse== | |
| − | Note: to produce the reference | + | {{RubyToImplement|ellipse|drawings/core|Ellipse|Object|initialize(x_radius, y_radius)<br/>x_radius()<br>x_radius=()<br/>y_radius()<br>y_radius=()<br/>render(g)}} |
| + | |||
| + | Add an [https://www.rubyguides.com/2018/11/attr_accessor/ accessors] for x_radius and y_radius. | ||
| + | |||
| + | Note: to produce the reference image the code below was used: | ||
<nowiki> slice_count = 32 | <nowiki> slice_count = 32 | ||
delta_theta = (2*Math::PI) /slice_count</nowiki> | delta_theta = (2*Math::PI) /slice_count</nowiki> | ||
| + | |||
| + | {{RubyToRun|ellipse|drawings/core|main}} | ||
[[File:Render_ellipse.png]] | [[File:Render_ellipse.png]] | ||
| − | === | + | ==CircularSegment== |
| + | {{RubyToImplement|circular_segment|drawings/core|CircularSegment|Object|initialize(x_radius, y_radius, theta_a, theta_z)<br/>render(g)}} | ||
| + | |||
| + | In geometry a [https://en.wikipedia.org/wiki/Chord_(geometry) chord] is a line segment which joins two points on a curve. We will define a <code>class CircularSegment</code> which renders a filled shape of an ellipse cut at the chord between theta_a and theta_z. | ||
| + | |||
| + | [[File:Chord_theta_a_z.png]] | ||
| + | |||
| + | Note: to produce the reference image the code below was used: | ||
| + | |||
| + | <nowiki> slice_count = 32 | ||
| + | delta_theta = (@theta_z-@theta_a) / slice_count</nowiki> | ||
| + | |||
| + | Note: a Chord with 32 slices will have 33 points. | ||
| + | |||
| + | {{RubyToRun|circular_segment|drawings/core|main}} | ||
| + | |||
[[File:Render_chord.png]] | [[File:Render_chord.png]] | ||
| − | + | ==Image== | |
| + | {{RubyToImplement|image|drawings/core|Image|Object|initialize(path)<br/>render(g)}} | ||
| + | |||
| + | should draw the pixels from (0,0) | ||
| + | |||
| + | {{RubyToRun|image|drawings/core|main}} | ||
| + | |||
[[File:Render_image.png]] | [[File:Render_image.png]] | ||
| − | + | ==Text== | |
| + | {{RubyToImplement|text|drawings/core|Text|Object|initialize(text, font)<br/>render(g)}} | ||
| + | |||
| + | {{RubyToRun|text|drawings/core|main}} | ||
| + | |||
[[File:Render_text.png]] | [[File:Render_text.png]] | ||
| − | + | ==Bézier Curve== | |
| − | + | {{RubyToImplement|bezier_curve|drawings/core|BezierCurve|Object|initialize(control_points)<br/>render(g)}} | |
| − | |||
| − | + | NOTE: you need not implement the interpolation yourself. Use the [https://www.cse.wustl.edu/~dennis.cosgrove/courses/cse425s/current/doc/Graphics.html#draw_curve-instance_method draw_curve] method on [https://www.cse.wustl.edu/~dennis.cosgrove/courses/cse425s/current/doc/Graphics.html Graphics]. | |
| − | |||
{| class="wikitable" style="text-align: right; " | {| class="wikitable" style="text-align: right; " | ||
| Quadratic (Second Order) Curve: | | Quadratic (Second Order) Curve: | ||
| Line 84: | Line 130: | ||
| [[File:Bézier_4_big.gif]] | | [[File:Bézier_4_big.gif]] | ||
|} | |} | ||
| + | |||
| + | {{RubyToRun|bezier_curve|drawings/core|main}} | ||
[[File:Render_bezier_curve.png]] | [[File:Render_bezier_curve.png]] | ||
=Testing Your Solution= | =Testing Your Solution= | ||
| + | ==Unit Test== | ||
| + | {{RubyUnitTest|*|drawings/core/relatively_fast/part_a}} | ||
| + | |||
| + | {{RubyUnitTest|*|drawings/core/relatively_slow/part_a}} | ||
| + | |||
==Visual Comparison== | ==Visual Comparison== | ||
| − | + | {{RubyToRun|part_a_snapshots_web_page_generator|drawings/core/snapshots|test}} | |
| + | |||
| + | ==Somewhat Outdated Testing Demo== | ||
| + | <youtube>utK0TewIRjc</youtube> | ||
Latest revision as of 11:24, 9 August 2023
Contents
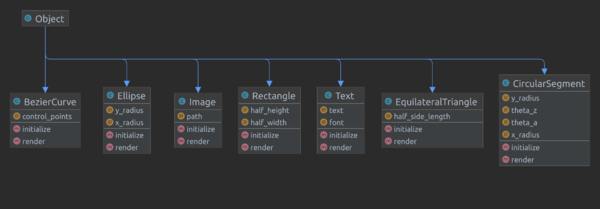
Diagram
Code to Use
Graphics
Point2
Math
Code to Implement
Each of the renderable components has its own file in the src/main/ruby/drawings/core directory.
Be sure to add accessors for all constructor parameters.
Equilateral Triangle
| file: | src/main/ruby/drawings/core/equilateral_triangle.rb | |
| class: | EquilateralTriangle | |
| superclass: | Object | |
| methods: | initialize(half_side_length) half_side_length() half_side_length=() render(g) |
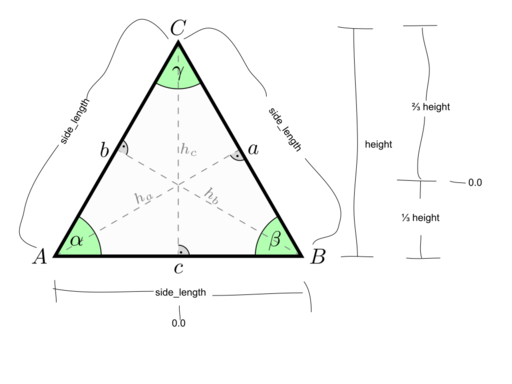
WARNING: Ruby division of two integers results in an integer. For example: 1/3 == 0
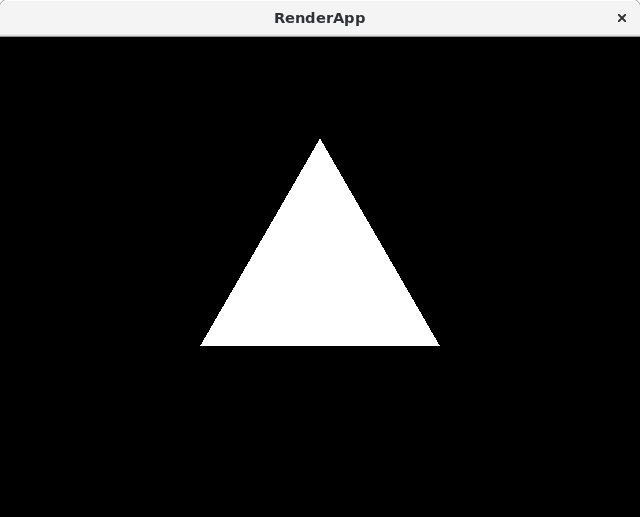
The triangle should be equilateral, rendered with its the origin at the center of mass.
Your constructor should accept a half_side_length parameter.
Add an accessor for half_side_length.
The height of the triangle should be side_length * sqrt(3)/2
The center of mass is one third from the bottom.
So, the bottom left point A's x coordinate should be -half_side_length and its y coordinate should be -1/3 height.
| file to run: | src/main/ruby/drawings/core/equilateral_triangle.rb |
Rectangle
| file: | src/main/ruby/drawings/core/rectangle.rb | |
| class: | Rectangle | |
| superclass: | Object | |
| methods: | initialize(half_width, half_height) half_width() half_width=() half_height() half_height=() render(g) |
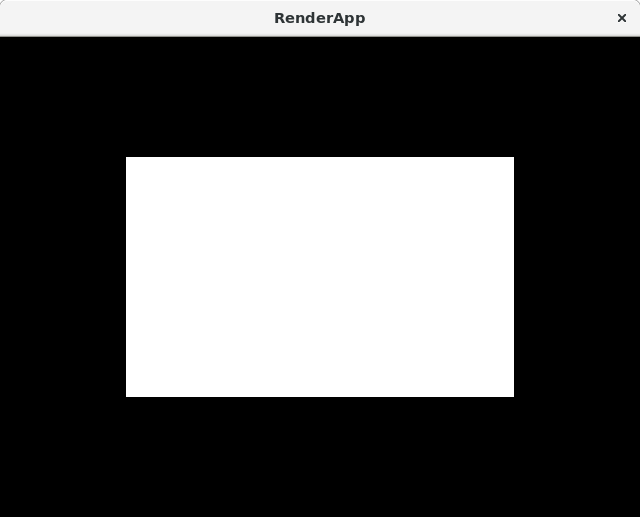
Add an accessors for half_width and half_height.
| file to run: | src/main/ruby/drawings/core/rectangle.rb |
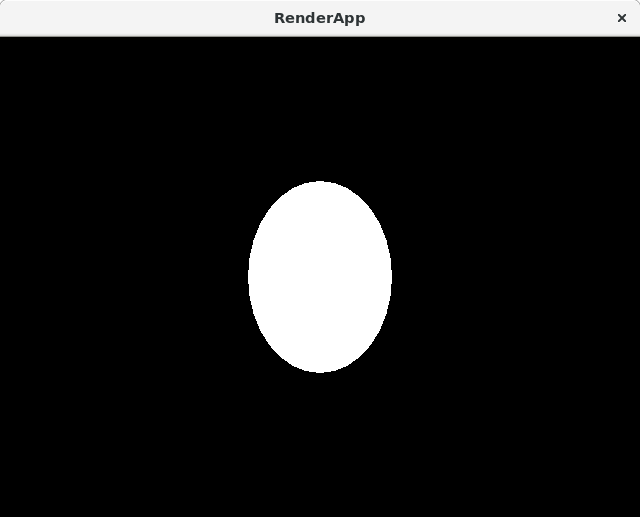
Ellipse
| file: | src/main/ruby/drawings/core/ellipse.rb | |
| class: | Ellipse | |
| superclass: | Object | |
| methods: | initialize(x_radius, y_radius) x_radius() x_radius=() y_radius() y_radius=() render(g) |
Add an accessors for x_radius and y_radius.
Note: to produce the reference image the code below was used:
    slice_count = 32
    delta_theta = (2*Math::PI) /slice_count
| file to run: | src/main/ruby/drawings/core/ellipse.rb |
CircularSegment
| file: | src/main/ruby/drawings/core/circular_segment.rb | |
| class: | CircularSegment | |
| superclass: | Object | |
| methods: | initialize(x_radius, y_radius, theta_a, theta_z) render(g) |
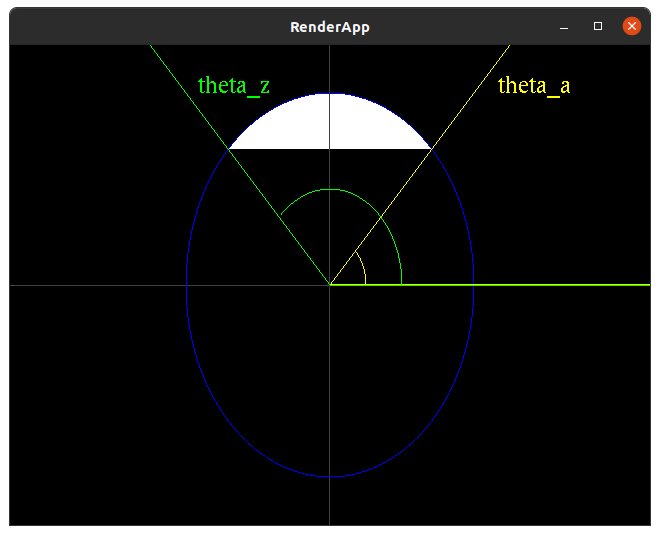
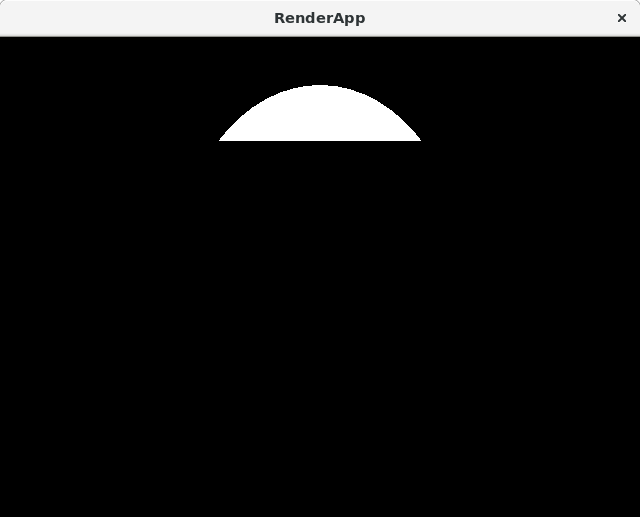
In geometry a chord is a line segment which joins two points on a curve. We will define a class CircularSegment which renders a filled shape of an ellipse cut at the chord between theta_a and theta_z.
Note: to produce the reference image the code below was used:
    slice_count = 32
    delta_theta = (@theta_z-@theta_a) / slice_count
Note: a Chord with 32 slices will have 33 points.
| file to run: | src/main/ruby/drawings/core/circular_segment.rb |
Image
| file: | src/main/ruby/drawings/core/image.rb | |
| class: | Image | |
| superclass: | Object | |
| methods: | initialize(path) render(g) |
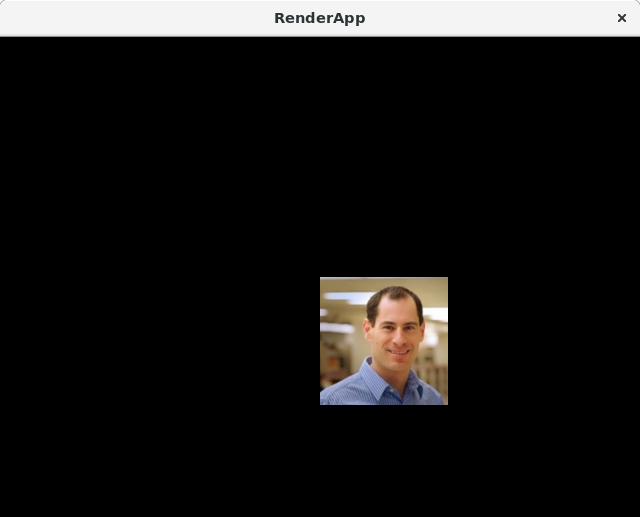
should draw the pixels from (0,0)
| file to run: | src/main/ruby/drawings/core/image.rb |
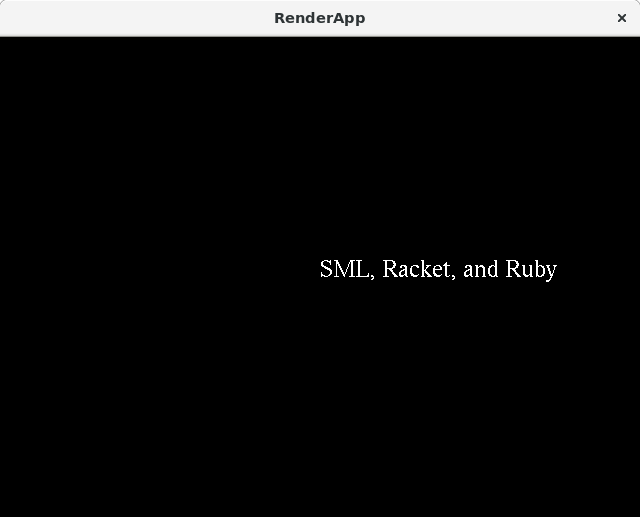
Text
| file: | src/main/ruby/drawings/core/text.rb | |
| class: | Text | |
| superclass: | Object | |
| methods: | initialize(text, font) render(g) |
| file to run: | src/main/ruby/drawings/core/text.rb |
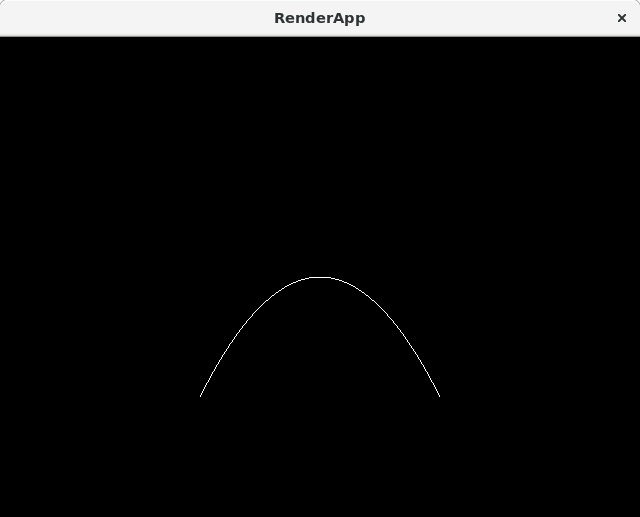
Bézier Curve
| file: | src/main/ruby/drawings/core/bezier_curve.rb | |
| class: | BezierCurve | |
| superclass: | Object | |
| methods: | initialize(control_points) render(g) |
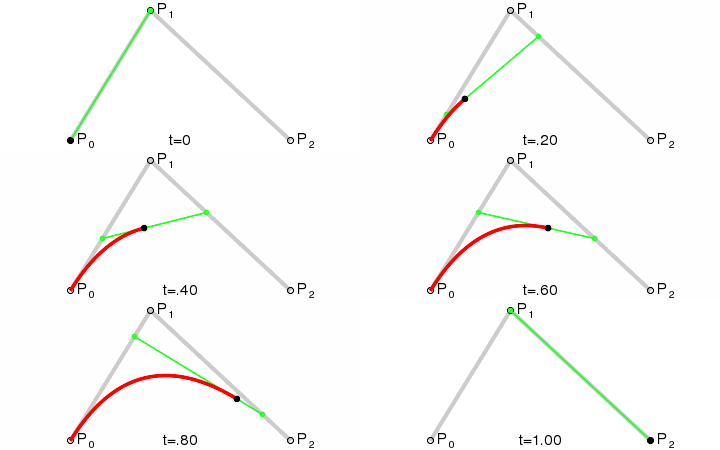
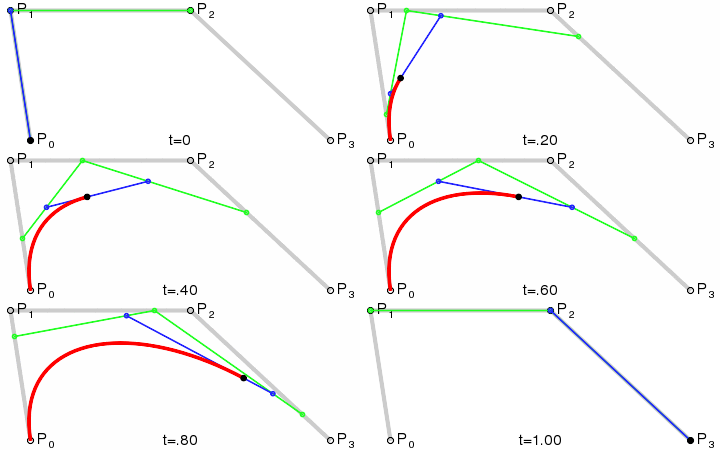
NOTE: you need not implement the interpolation yourself. Use the draw_curve method on Graphics.
| Quadratic (Second Order) Curve: | 
|
|
| Quadratic (Third Order) Curve: | 
|
|
| Fourth Order Curve: | 
|
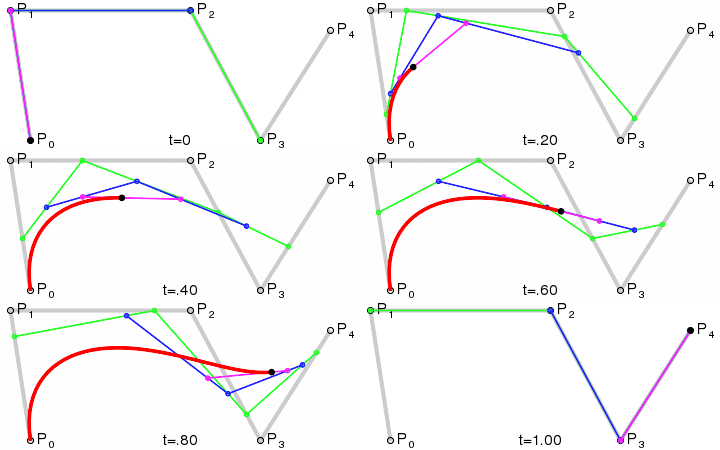
|
| file to run: | src/main/ruby/drawings/core/bezier_curve.rb |
Testing Your Solution
Unit Test
| file: | src/test/ruby/drawings/core/relatively_fast/part_a/*.rb |
note: ensure that you have removed all printing to receive credit for any assignment.
| file: | src/test/ruby/drawings/core/relatively_slow/part_a/*.rb |
note: ensure that you have removed all printing to receive credit for any assignment.
Visual Comparison
| file to run: | src/test/ruby/drawings/core/snapshots/part_a_snapshots_web_page_generator.rb |
Somewhat Outdated Testing Demo
