Difference between revisions of "Fanuc How Tos, FAQ, etc."
From ESE497 Wiki
Jump to navigationJump to search| Line 52: | Line 52: | ||
* Test by putting in World Frame and make sure the tip moves in the desired X,Y or Z directions | * Test by putting in World Frame and make sure the tip moves in the desired X,Y or Z directions | ||
| − | + | Joint 1 | |
| + | |||
[[File:Joint_1.jpg|300px]] | [[File:Joint_1.jpg|300px]] | ||
| − | + | ||
| + | Joint 2 | ||
| + | |||
[[File:Joint_2.jpg|300px]] | [[File:Joint_2.jpg|300px]] | ||
| − | + | ||
| + | Joint 3 | ||
| + | |||
[[File:Joint_3.jpg|300px]] | [[File:Joint_3.jpg|300px]] | ||
| − | + | ||
| + | Joint 5 | ||
| + | |||
[[File:Joint_5.jpg|300px]] | [[File:Joint_5.jpg|300px]] | ||
Revision as of 22:45, 27 June 2016
FAQ
- Run Program
- Turn on FANUC
- Turn the key to Auto mode on Robot
- Move the switch on the Teaching Pendant (TP) to OFF.
- Press Select on the TP and scroll down to the appropriate communication program. (LABVIEW_COM, LV_COM_FRM, etc.)
- Press Enter
- Hit Reset to clear any Faults (Red LED on)
- Hit the green Start button on the Fanuc controller. Light should turn on Green. If it doesn't, then check for errors. Robot will move to it's HOME position.
- Press FCTN -> Abort All to stop program - Green light should turn off
- Arrow up to line 1 of LV_COM_FRM and hit the Green button on the Robot to restart
- View Alarm Screen - if you can't clear an error you will want to do this to see what the real problem is
- Menu -> Alarms -> Alarm Log
- Use Teaching Pendant
- Keyed control knob in T1 position
- Teaching Pendant in ON position
- Press Deadman switch in half way to do anything
- Move robot with Teaching Pendant
- Press Coord until Joint Frame is selected
- Press Shift and any of the blue motion buttons to move the 6 joints
- Press +%/-% to adjust the speed
- Open and Close Gripper
- Menu -> I/O -> Robot. Press Enter.
- Arrow down to Gripper
- F4 (On) Opens
- F5 (Off) Closes
- Clear Errors on Teaching Pendant
- Push Deadman switch in halfway
- Hold Shift and push Reset on TP
Recalibrate
- Keyswitch in T1, Teaching Pendant in On
- Coord Mode until Joint is selected
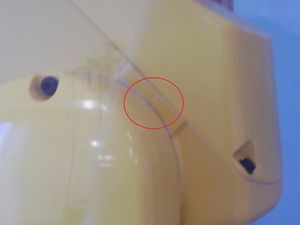
- Move all 6 joints 30 degrees and then back 30 degrees and then line up the registration marks (photos below)
- Joint 4 doesn't have a mark - just line it up flush - make sure the words are in the up position
- Joint 6 doesn't have a mark - just line up horizontally with the words down.
- If you get "No Pulse Detected" error on a joint, then you just manually move the joint and then put it back. ????????
- Menu -> Next -> System -> Master/Cal
- If Master/Cal isn't shown in the menu, then you have to enable it:
- Menu -> Next -> System -> Variables -> MasterEnable -> 1. Now Master/Cal will be in the menu.
- Click on Zero Position Master
- Yes (F4)
- If Master/Cal isn't shown in the menu, then you have to enable it:
- You should get warning "SYST-212 Need to apply DCS parameter"
- Menu -> Next -> System -> DCS
- Scroll down to Mastering parameter: CHGD
- Click Apply (F2)
- Enter Code 1111
- Please Wait ...
- Click OK (F4)
- Should show Mastering parameter: PEND
- Cycle Power
- Test by putting in World Frame and make sure the tip moves in the desired X,Y or Z directions
Joint 1
Joint 2
Joint 3
Joint 5
Errors
- "SRV-038 Pulse Mismatch" Error
- If the problem is just 1 axis (G:1 A:5)
- Menu -> Next -> System -> Master/Cal -> RES_PCA (soft key F3)
- Answer Yes. This should clear the alarm
- Menu -> Next -> System -> Master/Cal -> RES_PCA (soft key F3)
- If the problem is just 1 axis (G:1 A:5)
- "SRVO-062 BZAL Alarm" Error
- Replace 4 C Cell batteries in battery compartment
- Clear Pulse Coders
- Menu -> Next -> System -> Master/Cal
- F3 (RES_PCA)
- Reset
- Cycle Power
- Repeat (You have to do this 2x)
- Menu -> Next -> System -> Master/Cal
- Re-Calibrate
- "MOTN-049 Attempt to move without Calibrated"
- Recalibrate


