This page describes how to use the Eclipse Java IDE to work on your CSE 241 programming labs. If you are familiar with Eclipse from CSE 131/501, there are just a few changes that you need to know about. If you've never used Eclipse but would like to start, please read the "installation" and "subversive" tutorials on the CSE 131 help page to get started, then read this document.
CSE 241 does not officially support using Eclipse to work on your labs in C++.
Each lab in 241 is a separate project in Eclipse. This is different from CSE 131, in which labs were distributed as separate packages under a common project.
To begin working on a lab, you need to give Eclipse the URL to the lab's specific path in your SVN repository. In the "SVN Repository Exploring" view, add a new repository location as described in the 131 tutorial, and give the following URL:
https://svn.seas.wustl.edu/repositories/repoName/cse241_fl15/labName
where repoName is the name of your repository, and labName is the name of the lab.
NB: do not specify a URL without a lab name to Eclipse. While you will be able to see your lab's files, Eclipse won't recognize that it is a Java project and so will not give you the expected interface to edit and run your code.
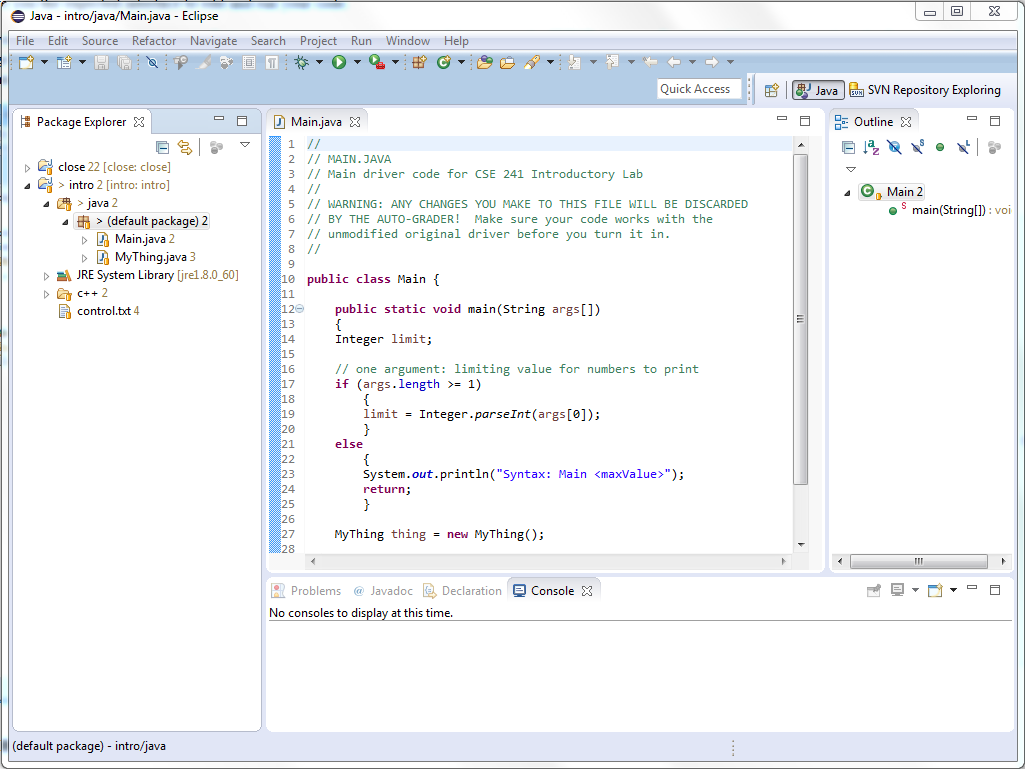
Once you've added the lab's location in Eclipse, check out a working copy of the repo in the SVN Repository Exploring View, then switch to the Java view. In the Package Explorer, you should be able to go to the java subdirectory for your lab and find the provided code in the "default package" (since there are no package declarations in the code). Here's an example of what you should see:

Some labs require one or more command-line arguments to run. If you've never had to deal with arguments, here's how to specify them in Eclipse.
Some labs take filenames as arguments. If you've got a file that you want your program to open, make sure you set the program's working directory to the directory where the file resides. This can be done at the bottom of the "Arguments" tab mentioned above.
We request README files as part of the turn-in process for each lab; some labs may ask for additional data, such as graphs. You should check in these additional files in the same directory as your code.
To check a file on your local filesystem into your repository, first go to the Java view in Eclipse. You can now drag the file to be checked in and drop it on top of the "java" directory icon. Eclipse will ask whether you want to copy or link the file to your project; you must copy it -- linking will not add it to the repository, even though it appears among the project's files in your local view. Once you've copied the file into the project, select ``Team/Commit'' to commit it to your repository.