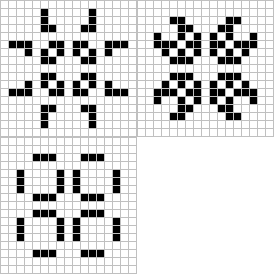
Extension : Extension 7.1: Conways Game of Life
- Authors
-
Arman Guerra
Conway’s Game of Life is a biology simulation that was developed by British mathematician John Horton Conway in 1970. It is designed to simulate cellular automation by creating an initial configuration of living and dead cells and observing how they evolve. Many interesting patterns have developed from the origins of the original simulation — producing patterns that pulsate, exist into infinity, and even glide like spaceships.
The rules of Conway’s Game of life are as follows:
- If a living cell has fewer than two living neighbors, it dies of loneliness
- If a living cell has more than three living neighbors it dies of overcrowding
- If a living cell has two or three neighbors, it continues to live
- If a dead cell has exactly three living neighbors, it is resurrected by friendship
This set of rules can end up making some very interesting patterns. Below we have drawn out some of the patterns that are made by cells in Conway's game of life. Dead cells are represented by white squares, living cells are represented by black squares.
Sample Patterns
Still Lifes
Block

Beehive

Loaf

Boat

Oscillators
Blinker

Toad

Beacon
![]()
Pulsar

Spaceships
Glider

Lightweight Spaceship

Perpetual Patterns
Gosper Glider Gun

Block-Laying Switch Engine

Directions
In this extension you will be responsible for building the simulator portion of Conway’s Game of Life (henceforth known as Conway, or Life). You can then run the game on your own patterns or on patterns that we provide.
The code for this work can be found conway package. The Conway class is where you will be doing all of your work. ConwayTest is the tester for Conway and Main is what you will run when your code is finished to actually see your work happen. The Main class creates a GUI, Graphical User Interface, which allows you to see cells dying and coming back to life. Open Conway. You will complete the following methods:
-
A
public Conway(int rows, int cols)constructor that specifies the dimensions of the Conway board. -
A
public int getRows()method, that is an accessor. -
A
public int getColumns()method, that is an accessorYour code should now pass the
getRowsAndColumnsTest() -
A
public void setLiveness(boolean b, int row, int col)method that takes in a row and a column, and whether that cell should be currently alive or deadYou must come up with a data type that stores values in rows an columns to represent all of the cells. There are multiple ways to store this information, but think carefully about which one you choose. Some choices will make remaining work easier than others. (Hint: This method’s signature may suggest an appropriate representation)
The unit test for liveness relies on
isAlive()(next) also being complete. -
An
public boolean isAlive(int row, int col)method, which returns whether the cell at that specific row and column is alive or dead. If the row and column are out of the bounds of that Conway object, then returnfalse.Your code should now pass the
isAliveTest()and thesetLivenessTest(). -
A
public void clear()method, which sets every cell in the Conway object to dead.Your code should now pass the
clearTest() -
A
public int countLivingNeighbors(int row, int col)method, which considers the cell at a certain row and column, and returns the number of living neighbors that it has.The neighbors of a certain cell are considered to be the eight cells that are surrounding it. Your
isAlive()should help you with this.Example Description 
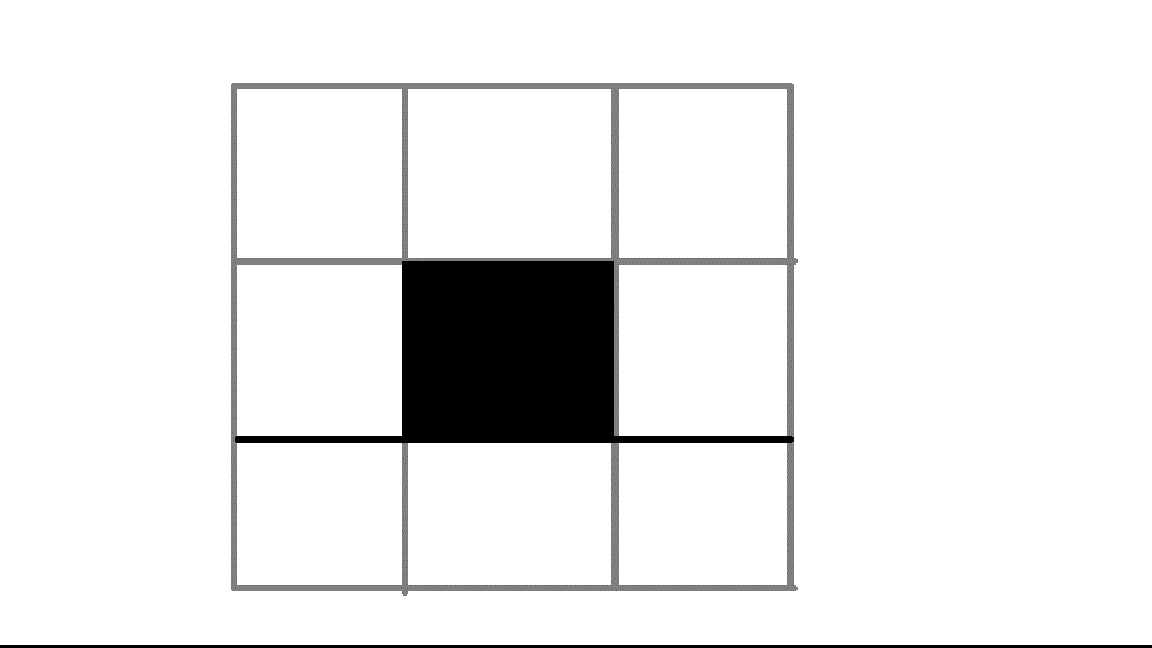
If you were to count the number of living neighbors of the living cell in the picture to the left, you would check the eight white squares that are surrounding it and count the ones that are alive. Since the cell in the middle has no living neighbors it will die of loneliness. So in the next step of the simulation it will become a white square. Example Description 
This is a random group of cells 
This shows the number of living neighbors for each corresponding location in the example above Once this method is finished your code should pass the
countLivingNeighborsTest() -
A
public void step()method, which executes a generation of life (one step of the simulation of life). Take all of the current cells and determine whether or not they will be alive in the next generation using the rules given above.You need to be careful how you update. The updates should not impact the outcome of another update. For example, when you figure out if the cell in row 0 and column 0 will be alive, this new value should not impact the computation for the surrounding rows. They should be based on the original value of row 0 column 0 before it’s next value was computed. (Hint: It may be helpful to use an additional array or an entirely new
Conwayobject)For instance, say cell A and cell B both alive and are neighbors. If you determine that A will be dead in the next generation, and you kill it, when you go to count the number of living neighbors of B, it will have fewer living neighbors now than it should.
Your code should now pass the
stepTest() -
public void yourDesignOne(),public void yourDesignTwo(), andlogAndCapture()are used for another extension. You do not need to complete them. -
The following methods are provided for you, do not change any of these:
-
public void blinker()allows the GUI to create a blinker pattern -
public void fourBlinkers()allows the GUI to create a four-blinker pattern -
public void gosperGliderGun()allows the GUI to create a gosperGliderGun pattern -
public void glider()allows the GUI to create a glider pattern -
Other supporting classes, including the visualization code, are in the
conwaysource folder.
-
-
Once you have completed all the methods, you can run
ConwayController.javato run a simulation.- You’ll want to select an item to simulate from the drop down menu on the right of the window.
- Then click on
Startto run a simulation. (Notice that each item in the menu corresponds to methods that were done for you already or that you haven’t finished, likeblinker()andyourDesignOne(). You can explore this more in another Extension)
Hint: If you need to debug your code the visual interface allows you to take one step at a time. If the game is not working, use the debugger or print information helpful to diagnosing the problems you see.
To Demo
Your code must pass all of the unit tests, and the GUI should work, and be able to display cells interacting with each other.