Background
The last studio introduced integrations using WebHooks as well as new hardware (the OLED display and Piezo) and the mini-studio introduced IFTTT as a tool for combining different services.
Objectives
The objectives of today's Studio are:
- Continue working with IoT integrations via webhooks
- Experiment with the PIR sensor
1. Studio Setup
As usual, today's studio will require groups of 3-4.
At least one person will need to write code and interact with the Argon, but everyone should discuss the work and fully participate.
1.2. Studio Distribution
As in the previous studios, all group members will need to be in a GitHub group (and repository)
- The group's Manager should create the repository. The GitHub group name should include the surnames of all group members.
- All other members should join the group.
The link for this studio is: https://classroom.github.com/g/udwi-DLj
2. Studio: Examples
This studio will work through an example and require that you build comparable examples from them.
2.1. PIR and Slack Integrations
Work through the Conference Room Monitor tutorial, but heed the following modifications:
- One person should create an account on slack.com or use an existing account. They should create a new channel for today too:
- Go to slack.com
- Use the
Launch Slackdrop down menu in the upper right - Select
Create a new workspaceat the bottom of the menu- Provide an email / enter a confirmation code
- Name the workspace whatever you'd like (cse222studio10-X maybe)
- Add your group members to your slack workspace
- Configure hardware as described above, BUT: use a buttonrather than a PIR sensor initally. (You'll have to update the provided code below with
pinModeappropriate for a switch) - The
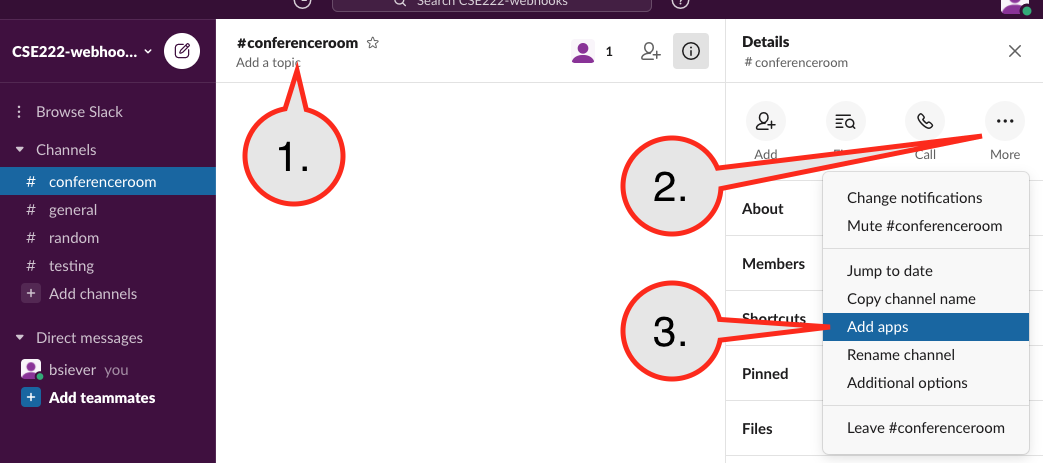
Add an app or integrationstep is difficult to find. To get to it:

- Select the channel name
- Select the
...menu - Select the
Add Appoption
- Use the following code rather than the example given in the tutorial (update the
setup()to work with a button!)/***************************************************************************** Particle Maker Kit Tutorial #3: PIR Motion Sensor This tutorial uses a Photon and the PIR motion sensor from the Particle Maker Kit to determine whether a conference room is in use (you could also use it for many other applications) and post the status to Slack. ******************************************************************************/ int ledPin = D7; // choose the pin for the LED int inputPin = D4; // choose the PIR sensor pin bool available; // status of conference room int motionCounter = 0; // variable to count motion events boolean update = false; // Time to post an update? Timer timer(20000, determineMotion); // software timer to check every 30s void setup() { pinMode(ledPin, OUTPUT); // set LED as output pinMode(inputPin, INPUT); // set sensor as input timer.start(); // start the determineMotion timer Serial.begin(9600); } void determineMotion() { // this function determines if there's motion if(motionCounter < 2) { // if very little motion was detected update = true; available = true; // set the status to available } else if (motionCounter >= 2) { if(available == true) { // only publish if the status changed update = true; available = false; // set the status to in use } } motionCounter = 0; // reset motion counter } // Update to webhook (and LED) void postUpdatesIfNeeded() { if(update) { update = false; digitalWrite(ledPin, available); if(available) { Particle.publish("conf_avail", "Available", PRIVATE); //publish to conf_avail webhook } else { Particle.publish("conf_inuse", "Inuse", PRIVATE); //publish to conf_inuse webhook } } } void loop() { if (digitalRead(inputPin) == HIGH) { // check if the input is HIGH motionCounter++; // increment motion counter Serial.println("Motion!"); } postUpdatesIfNeeded(); delay(500); // wait 0.5s } - Review the code carefully. Identify:
- How often will it post to the webhook?
- The PIR sensor should output a true when someone is in the room., but PIR sensors are prone to some false-positives and false-negatives. What does the code do to try to reduce the impact of false detections?
- Is the timing appropriate for "conference room use"?
- Once you have it working with Slack and the switch, update the code so it won't repeatedly post the same message.
- Finally, use the PIR sensor included in the parts kit.
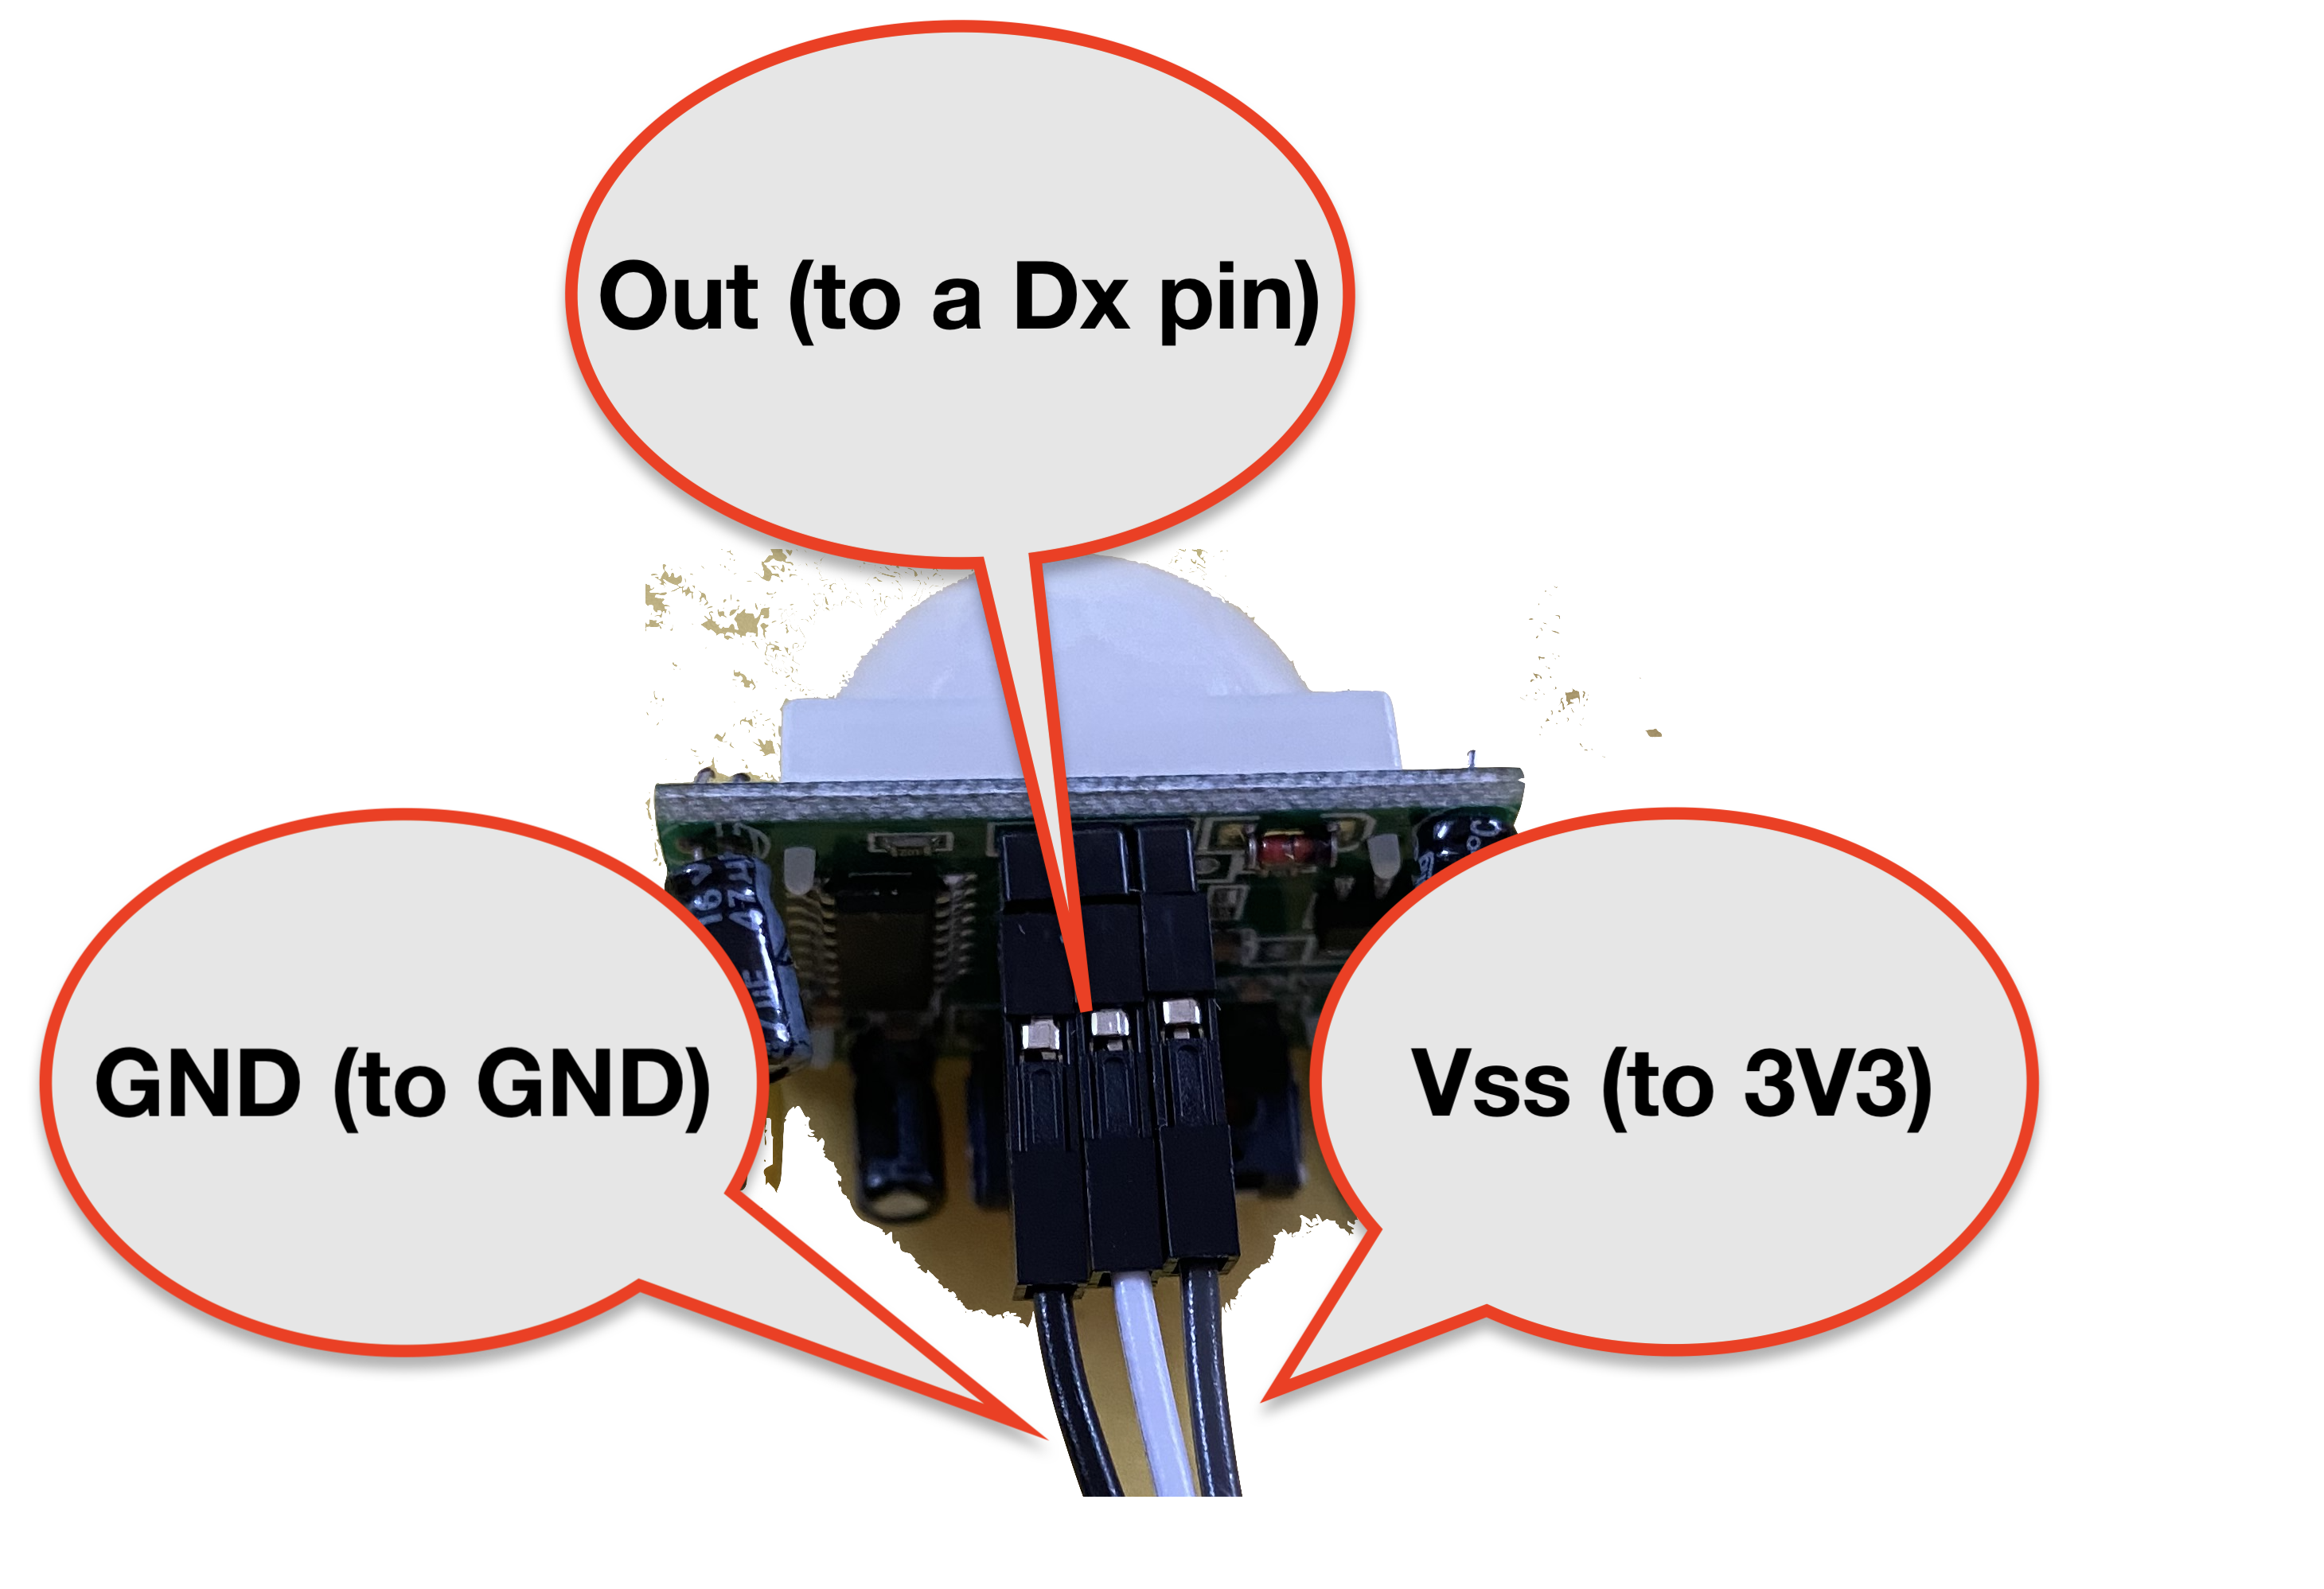
- The kit comes with wires with male and female ends that can be used to connect it:

(You can peel a set of three off) - The pins should be connected as:

(You can peel a set of three off) - Be sure to update the
pinMode()!
- The kit comes with wires with male and female ends that can be used to connect it:
- Test your work with the PIR sensor. Note that it can be finicky and isn't meant for use at class ranges. Review the details of PIR sensors: SparkFun Guide
- Answer questions in the
README.md
3. In-Class Checkout
Commit your work to GitHub:
- The Spokesperson should complete changes, save them, commit them locally, then push to GitHub using GitHub desktop.
- The Recorder should save any changes, commit them locally, use GitHub desktop to Pull and merge any changes to the repo, and finally Commit/Push the additions back to GitHub.
- The Technician will be using the cloud-based IDE today, but code will still need to be merged into the repo locally.
- Verify your commits from the Recorder, an Spokesperson, and Technician are on GitHub.
- Show a TA your progress
4. Post-Class Checkout
Complete any unfinished work and commit it to your repo by 11:59pm Sunday