Many of the procedures in the ABAQUS/CAE documentation involve using one or more of the three mouse buttons. The following list explains the importance of each mouse button when interacting with ABAQUS/CAE:
Mouse button 1
You use mouse button 1 to select objects in the viewport, to expand pull-down menus, and to select items from menus. The instructions “click,” “select,” and “drag” in the documentation refer to mouse button 1.
Mouse button 2
Clicking mouse button 2 in the viewport signifies that you have finished the current task. For example:
Selecting entities from the model: when you create a node set, you select the nodes to include in the set. Clicking mouse button 2 indicates that your selection is complete and you are ready to create the set.
Using a tool: click mouse button 2 to indicate that you have finished with a view manipulation tool.
![]()
Mouse button 3
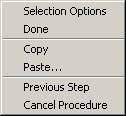
You press and hold mouse button 3 to access a popup menu that contains shortcuts to functions related to the current procedure. For example, when you press mouse button 3 in a viewport while creating a geometry set, ABAQUS/CAE displays the following menu: